If you’ve ever made your dog’s nail bleed and sworn you’d never try again, you’re not alone.
Many owners feel exactly the same way: dark nails make it hard to see where the quick ends, and the memory of a nail that once bled keeps the clippers in the drawer.
That fear is real, and it’s the reason most dogs end up at the groomer every month instead of getting the regular trims they need. Dark nails, a dog that fights it, not knowing where to cut: these aren’t signs you’re doing it wrong. They’re the specific problems this guide solves. By the end, you’ll know exactly how to trim dog nails at home, including dark nails, without the guesswork. We’ll cover the right tools, how to find the quick, a step-by-step trimming process, and what to do if things go sideways.
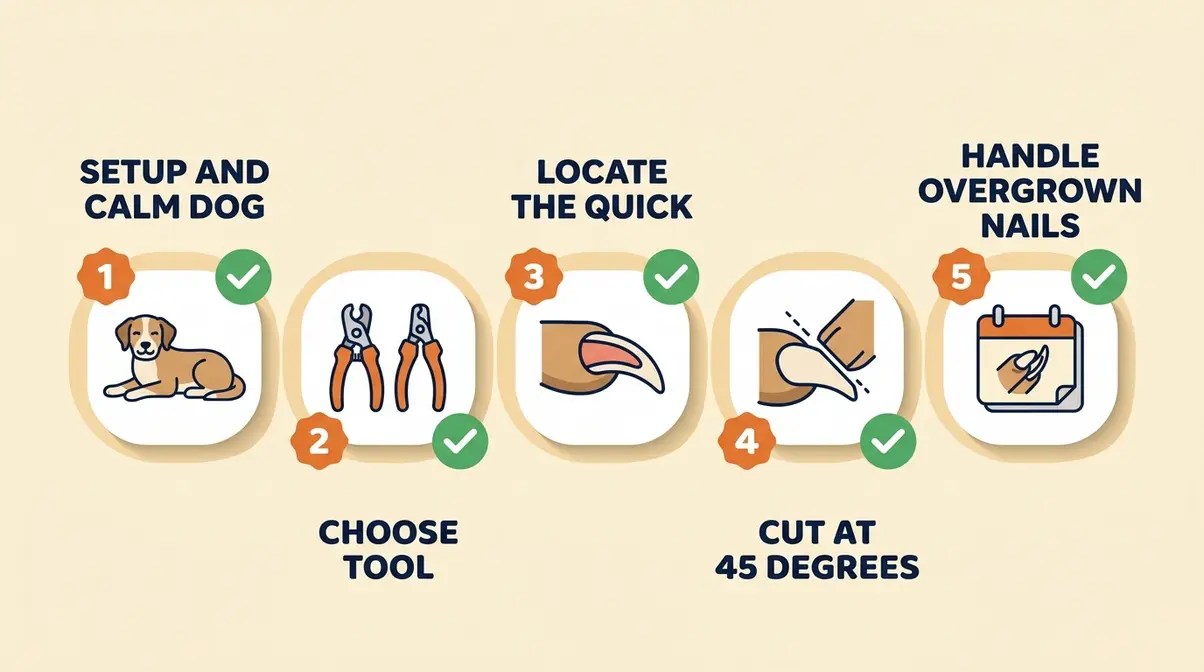
To trim dog nails at home, gather sharp clippers or a grinder, identify the quick (the pink blood vessel inside the nail), and cut at a 45-degree angle, removing only the tip. This 5-step process takes 10-15 minutes. For dark nails, trim in thin slices and stop when the cut surface shows a chalky white ring around a dark center dot.
Trimming your dog’s nails at home safely takes 5 steps and about 15 minutes, once you know where to cut.
- The quick is your guide: In light nails it’s the pink center; in dark nails, stop when the cut surface shows a chalky white ring around a dark center dot.
- Sharp tools matter: Dull clippers crush the nail instead of cutting it cleanly. Most dogs who flinch during trims are reacting to a dull blade, not the quick.
- Overgrown nails need The Gradual Recede Method: Trim a small amount every 7-10 days to encourage the quick to recede safely over 4-6 weeks.
- If you hit the quick: Stay calm, apply styptic powder, and reward your dog. It happens to everyone, and your reaction in the next 10 seconds determines whether it becomes a setback or a blip.
What You’ll Need Before You Start
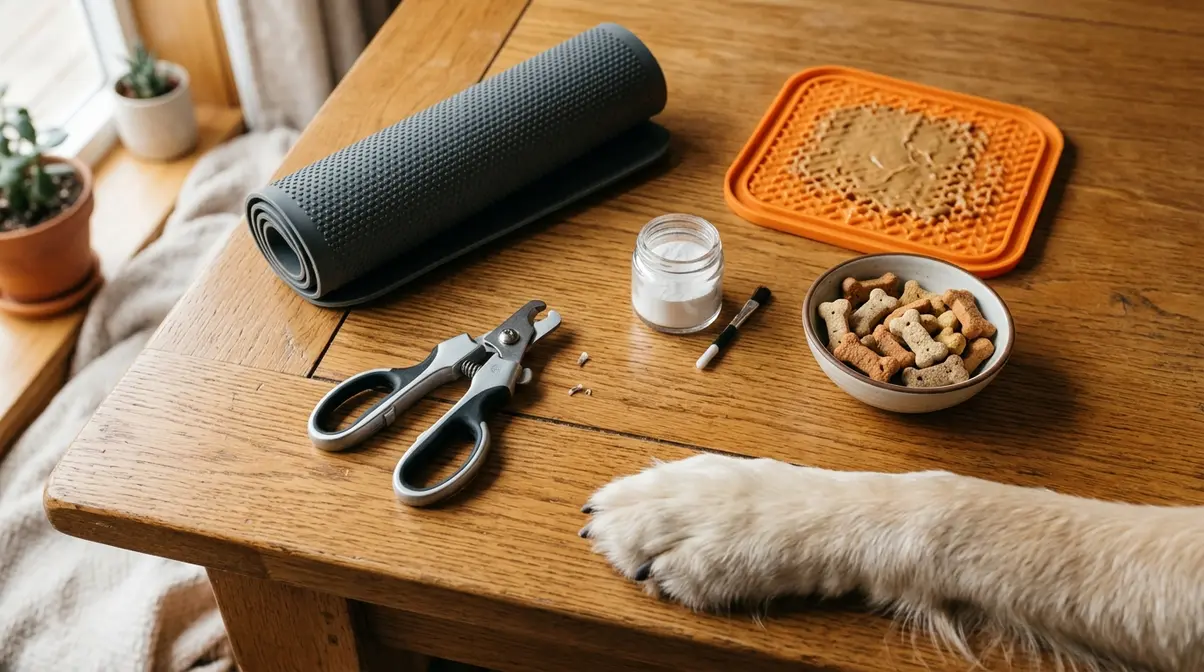
Before you trim your dog’s nails at home, gather these five items. Having everything ready prevents mid-session scrambling that unsettles your dog.
Your pre-trim checklist:
- Nail clippers (scissor-style or guillotine-style): The cutting tool for most owners. Scissor-style clippers offer the most control; guillotine-style work well for small dogs. Either way, sharp is non-negotiable; dull clippers crush the nail rather than cutting it cleanly, causing pain even when you never touch the quick.
- Nail grinder (optional): A rotating abrasive tool that files nails gradually. Useful for dogs who panic at the snapping sound of clippers.
- Styptic powder or cornstarch: This is your safety net; keep it within arm’s reach before you start, not after. Styptic powder (such as Kwik Stop) is a clotting agent that stops bleeding fast if you nick the quick. Cornstarch works in a pinch.
- High-value treats: Not your dog’s regular kibble. Something they go wild for, small pieces of chicken, cheese, or commercial training treats.
- Non-slip mat and lick mat (optional): A non-slip surface keeps your dog steady; a lick mat spread with peanut butter occupies their attention during the trim itself.
The American Kennel Club advises that most dogs need a nail trim every three to four weeks, though frequency depends on activity level and how quickly the nails grow. Set aside 15 minutes for your first session. It gets faster once you and your dog know the routine.
For more on integrating nail trims into a regular grooming routine, our grooming guide covers the full picture.
Once you have everything ready, the first step is setting up a calm environment, since your dog’s mood before you start matters as much as your technique.
Step 1: Set Up Your Space and Calm Your Dog
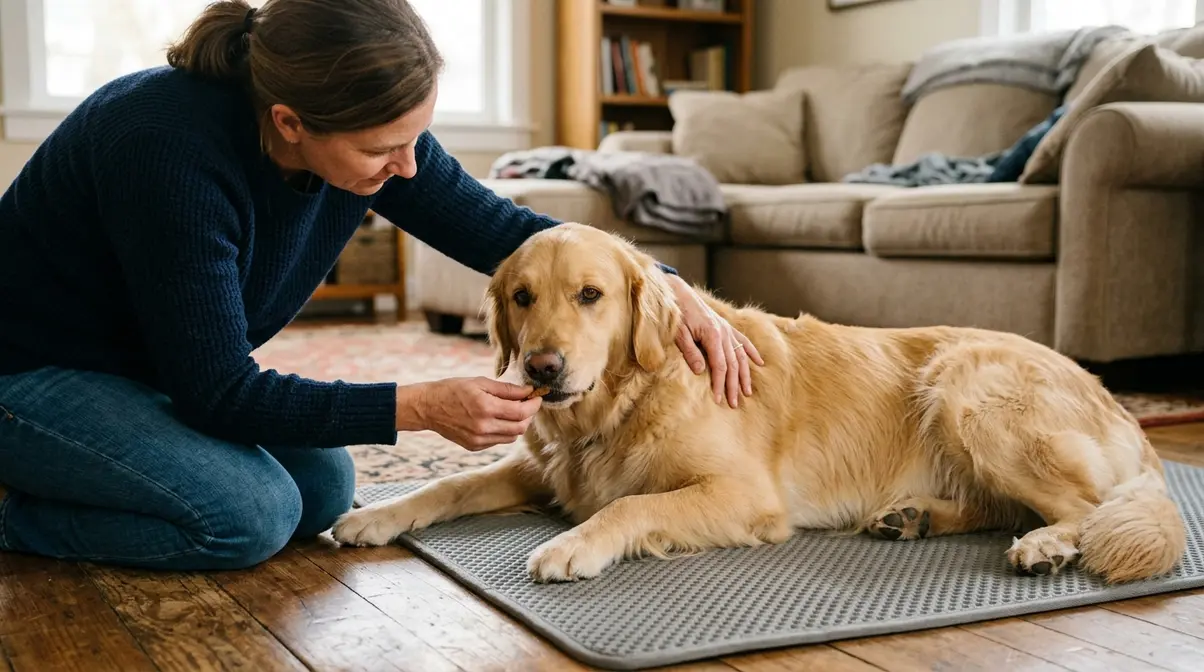
A dog who “fights it” is the most common reason owners give up on home nail trims. The truth is simpler than it feels: most resistance comes from anxiety, not stubbornness, and anxiety responds to a specific protocol. Getting this step right is what separates a 15-minute trim from a 45-minute wrestling match.
For dogs whose nails are severely overgrown, we’ll cover The Gradual Recede Method in Step 5 before you start cutting. That context matters before you pick up the clippers.
Cooperative care for nail trimming, the step-by-step paw desensitization protocol from Every Dog Austin, follows the same sequence used in veterinary cooperative care programs: touch paw, reward, hold paw, reward, tap nail with clippers, reward generously at each stage. It’s not a trick. It’s the same approach professional vet techs use to make handling stress-free. For dogs with broader anxiety around handling, our guide on managing a dog’s anxiety during stressful events walks through the underlying principles.
Checkpoint: Your dog is lying or standing calmly, you have treats within reach, and the clippers are nearby but not yet in hand.
How to Hold Your Dog for Nail Trimming
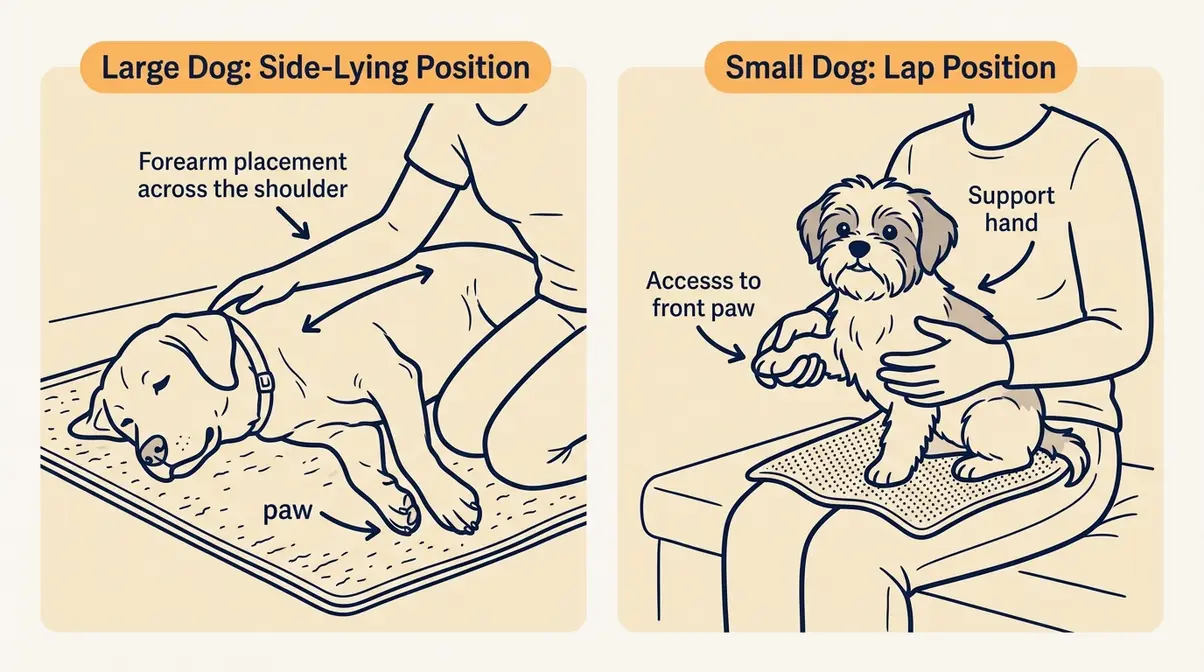
Positioning your dog correctly reduces their ability to pull away and keeps you in control without resorting to forceful restraint.
Small dogs: Have them sit in your lap or on a table with a non-slip mat. Tuck your dog against your body so their movement is naturally limited; no tight grip required.
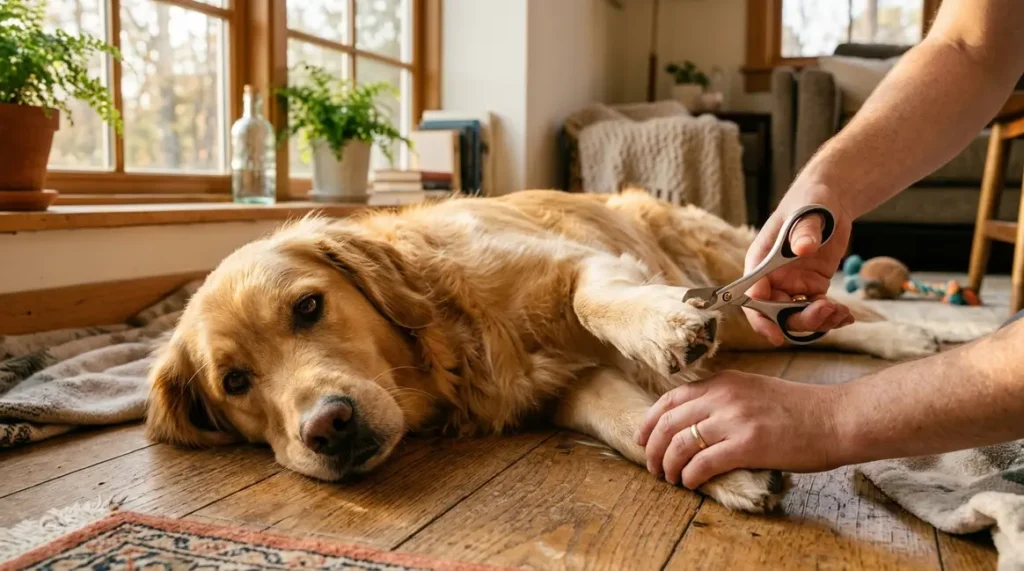
Large dogs: Ask your dog to lie on their side on the floor, then kneel beside them. Rest your forearm gently across their shoulder to discourage standing. This isn’t a hold-down; it’s a calm, steady presence. Most large dogs accept this position once it becomes familiar.
Both sizes: Work in good lighting and avoid leaning directly over your dog in a way that feels threatening. For a large dog that resists lying down, start with them standing and work on one paw at a time; switching positions mid-session is fine. If this is your first time, having a second person present to offer treats and gentle reassurance makes the whole process easier.
Positioning sorted. Now let’s talk about building a positive association before you make the first cut.
Building a Positive Association Before You Start
The 4-step desensitization sequence below is the foundation of cooperative care for nail trimming. It pairs the tool with a positive outcome before any discomfort occurs, which is what breaks the anxiety cycle:
- Touch paw lightly → give a treat immediately
- Hold paw for 3 seconds → give a treat
- Tap nail with clipper (don’t cut) → give a treat
- Make one cut → jackpot treat (several treats in quick succession)
This same protocol is used in veterinary cooperative care programs because it works: the dog learns that the clipper predicts good things, not pain. For dogs already fearful, spend several sessions on step 1 only before progressing. Rushing makes it worse.
A lick mat spread with peanut butter is a practical shortcut for intermediate owners. It occupies your dog’s attention during the actual trim, reducing the reactive movement that causes accidents.
With your dog calm and your tools ready, the next step is choosing the right instrument for the job.
Step 2: Choose the Right Nail Trimming Tool
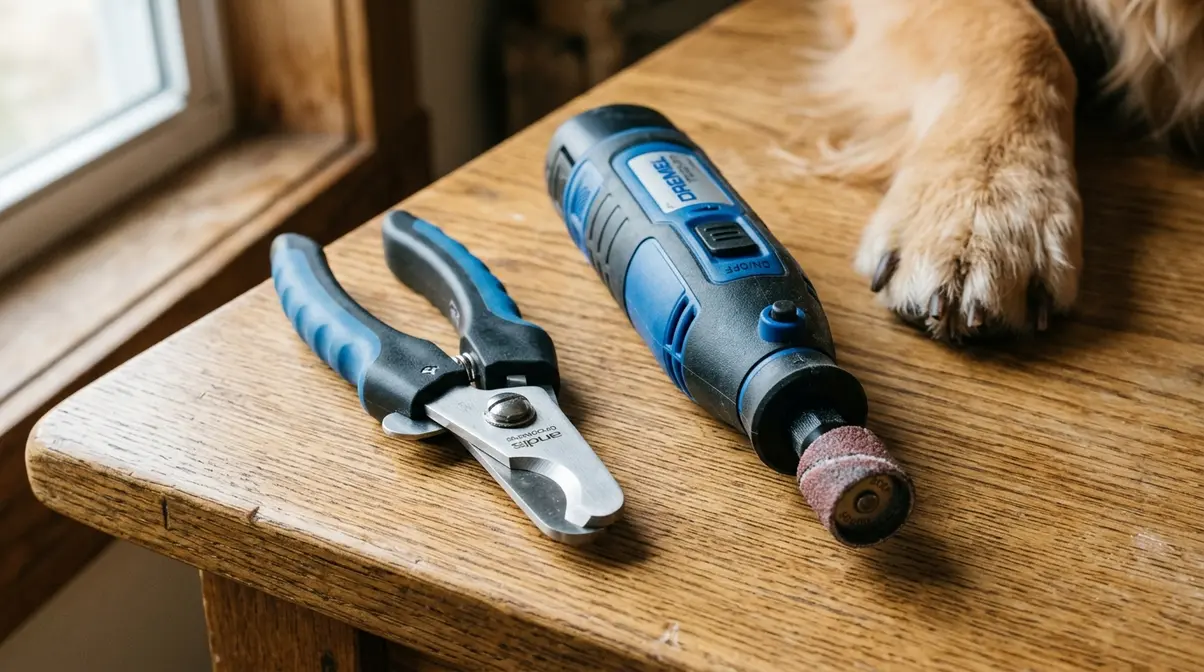
Three tools can trim your dog’s nails at home. Which one is right depends on your dog’s temperament, nail thickness, and how they react to sound and vibration. There’s no universally “best” option; the right tool is the one your dog tolerates.
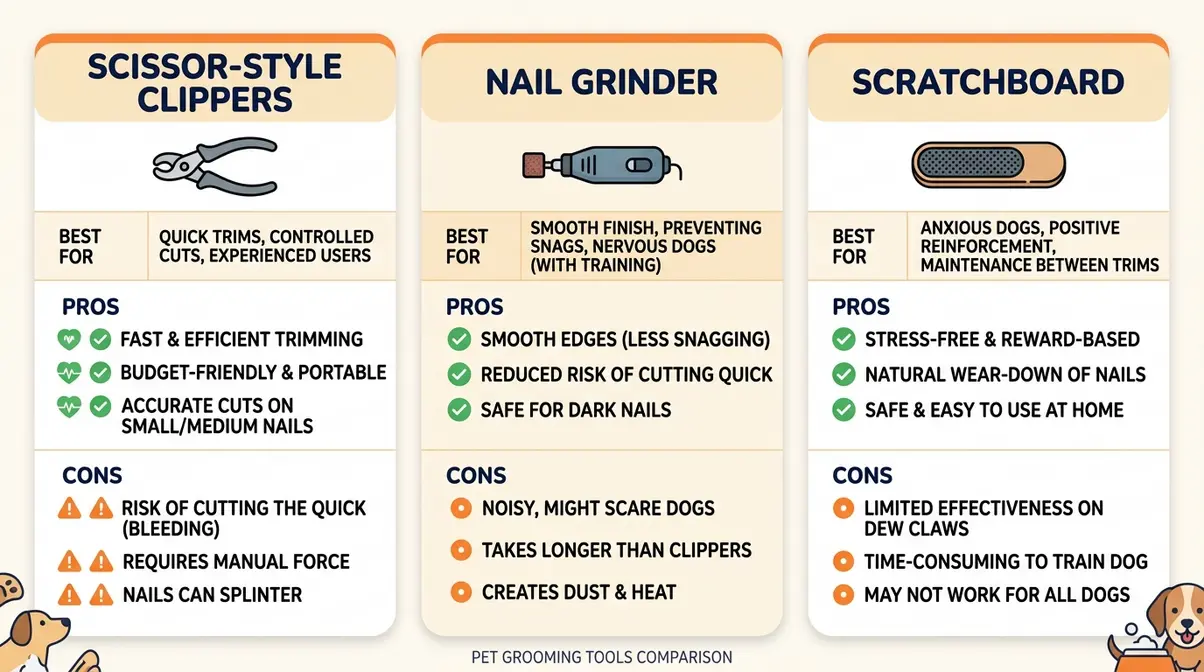
| Tool | Best For | Key Risk |
|---|---|---|
| Scissor-style clippers | Most dogs; medium to large breeds | Dull blades crush the nail |
| Guillotine-style clippers | Small dogs with thin nails | Blade dulls faster; needs regular replacement |
| Nail grinder (Dremel) | Dogs who panic at the clipper snap | Heat, noise, fur-catching, nail dust |
| Scratchboard | Dogs with severe clipper phobia | Only files front nails; slow progress |
If your dog is calm, start with scissor-style clippers. If they panic at the snap, try a grinder. If they hate both, a scratchboard is worth a session.
Clippers: Scissor-Style vs. Guillotine-Style
Scissor-style clippers (also called bypass clippers) use two curved blades that cross like scissors. They offer the most precise control and suit medium to large dogs. Most vets and vet techs reach for these first because you can see exactly where the blade will land before you squeeze.
Guillotine-style clippers work differently: the nail slides through a ring and a blade sweeps across. They’re easier to maneuver on small dogs with thin nails. The trade-off is that the blade dulls faster and needs replacing more often than scissor-style blades. Plan to replace or sharpen your clippers annually, or sooner if they start crushing rather than cutting.
The number one mistake owners make is using dull clippers. Dull blades crush and split the nail instead of cutting cleanly, causing pain even when you’re nowhere near the quick. If your dog flinches when you cut, even when you’re well away from the quick, dull clippers are often the culprit.
Grinders work differently, and for some dogs, they’re a real relief. But they come with trade-offs worth knowing before you buy one.
How to Trim Dog Nails with a Grinder (and When to Skip It)
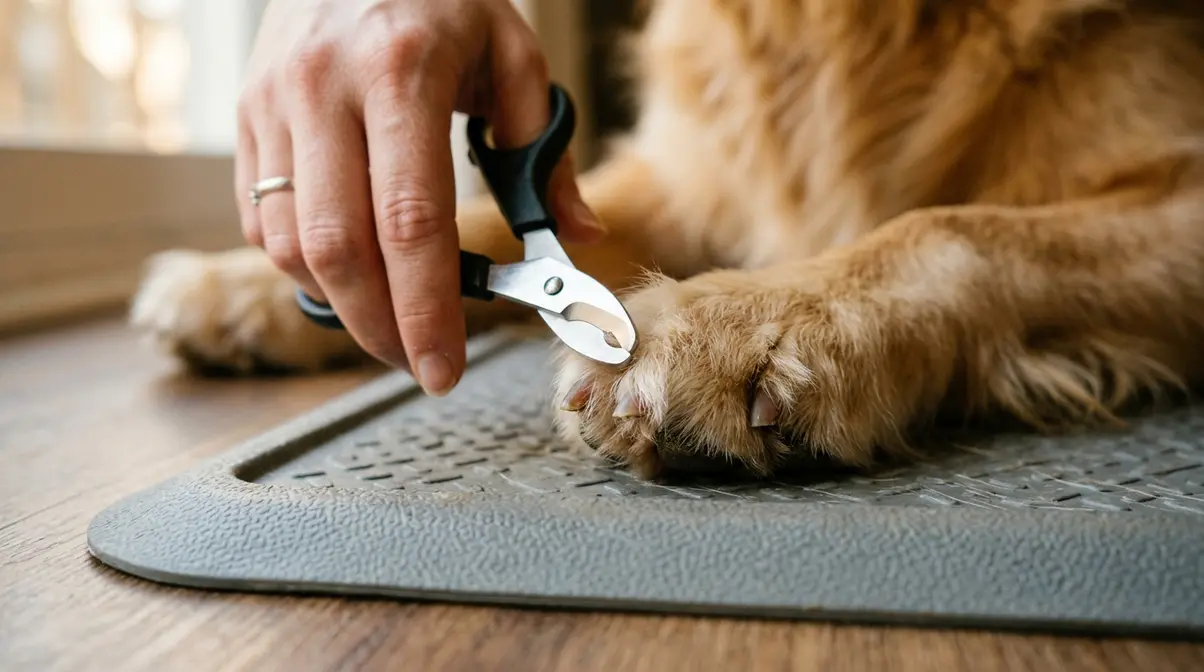
A nail grinder uses a rotating abrasive tip to file the nail gradually rather than cutting through it in one motion. There’s no “snap” sound; the finish is smooth, and many dogs who panic at clippers tolerate grinders well.
That said, risks of nail grinders are real and worth knowing. According to Dr. Julie Buzby, DVM, founder of ToeGrips, grinders can catch a dog’s fur or the owner’s hair and create fine nail dust that shouldn’t be inhaled. Heat buildup is another concern. If you hold the grinder in one spot too long, it gets uncomfortable fast. Keep the tool moving in short passes.
- The three specific grinder risks to manage:
- Fur or hair catching in the rotating tip (keep long fur trimmed back from the nail area)
- Fine nail dust (work in a ventilated space; consider a light mask)
- Heat from prolonged contact (use 2-3 second passes, not sustained pressure)
One option most guides don’t mention: the scratchboard. It’s a piece of plywood covered with 80-grit sandpaper. Teach your dog to scratch it on cue, and it files the front nails naturally with zero paw handling required. For a dog that shuts down the moment clippers appear, a scratchboard session every few days can maintain front nail length between full trims.
A quick note on wet versus dry nails: nails trimmed after a bath are slightly softer, which can make cutting smoother, especially with thicker nails. The difference is minor for most dogs, but worth trying if yours has particularly dense nails.
Tool chosen. Now for the part that makes most owners sweat: figuring out exactly where to cut.
Step 3: Locate the Quick Before You Cut
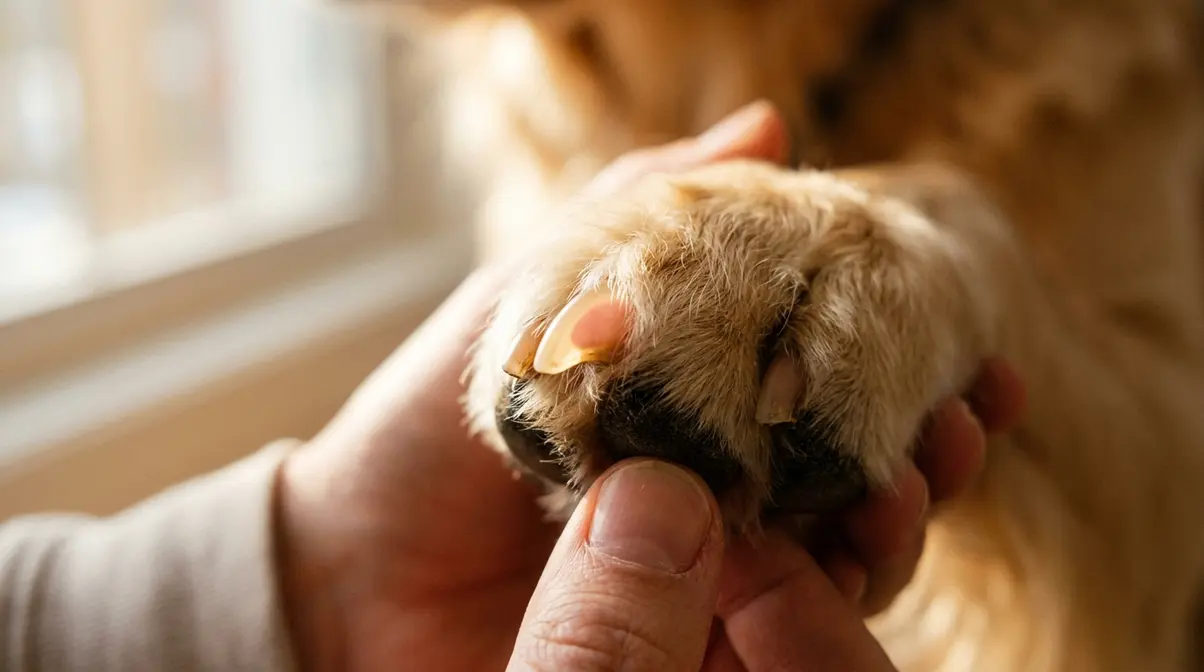
The quick, the blood vessel and nerve inside your dog’s nail, is the reason nail trimming feels risky. But it gives you clear visual signals before you reach it. Watch for these cues.
According to WSU Veterinary Medicine, identifying the quick and maintaining the correct cutting angle are the two most critical skills in safe nail trimming. The good news: both are learnable in a single session once you know the visual cues.
Checkpoint: You can identify the pink oval in light nails and know to stop at the chalky ring with a dark center dot in dark nails. You’re ready to cut.
How to Find the Quick in Light-Colored Nails
Hold your dog’s paw up toward a light source. In light or white nails, the quick appears as a pink or reddish oval running through the center of the nail, visible right through the shell.
The safe cutting zone is the curved, pale tip of the nail: the area beyond the pink oval where the nail is solid and translucent. As you approach the quick, the pink oval gets wider and closer to your cut line. Stop when the gap between your intended cut and the edge of the oval is about 2mm.
On a white nail, you can often see the quick clearly from the side; use this angle to gauge depth before you cut. One nuance worth knowing: in older dogs, the quick can appear darker and more opaque, which makes it slightly harder to read. Take a little more off the tip and work in from there.
Dark nails are a different challenge; you can’t see the quick at all. The method below works.
How to Trim Black Dog Nails That Are Overgrown
You cannot see the quick from the outside in black nails. So instead of guessing, you work from the cut surface inward, trimming thin slices and reading what each slice reveals.
Watch for this progression:
- First slice: The cut surface looks evenly white or chalky all the way across, with no dark center. You’re in the dead nail shell, safe to continue.
- Second or third slice: A small dark oval or dot begins to appear in the center of the cut surface. This is your stop signal. The quick is 1-2mm away.
- The chalky ring: When the outer edge of the cut surface looks white and powdery but the center is starting to darken, you’ve reached the safe limit. Put the clippers down.
Think of it like peeling an onion, each thin slice reveals a new layer. The moment you see that dark center dot, stop.
If you’ve made a dark nail bleed before, it almost certainly happened because you cut past this signal. Now you know what to watch for. Trimming black dog nails at home becomes far less stressful once you trust the visual cues rather than guessing at depth.
Whether your dog has light or dark nails, the safe zone follows the same rule: cut only the tip.
How Much to Cut: The Safe Zone
The safe zone is the curved tip of the nail, roughly the last 2mm before the quick begins. This applies to both light and dark nails.
“When in doubt, cut less; you can always take another slice.”
You can always remove a little more in the same session or the next one. You can’t undo a cut that went too deep. For overgrown nails, the quick has grown out with the nail, which means the safe zone is much smaller than the nail’s length suggests. That’s exactly why The Gradual Recede Method in Step 5 exists. It’s not about being cautious; it’s about working with the nail’s biology rather than against it.
Safe zone identified. Now let’s make the actual cut.
Step 4: Trim the Nails at the Correct Angle
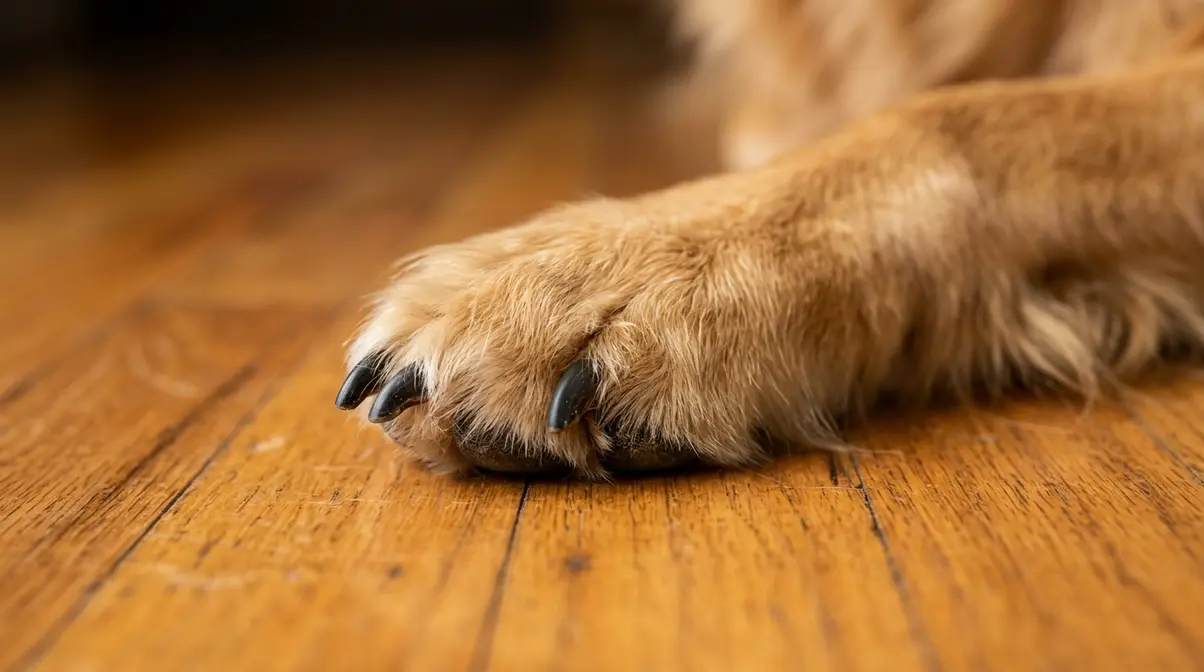
The correct cut is a 45-degree angle, following the nail’s natural curve from the bottom upward. A straight horizontal cut across the tip is more likely to split the nail and put uneven pressure on the quick. Trimming your dog’s nails at home gets noticeably cleaner results once this angle becomes automatic.
As Texas A&M School of Veterinary Medicine notes, a pet’s nails should be trimmed at an angle to trim a dog’s nails that follows the natural slant of the nail growth, and the process should always include praise and treats to build a positive association (Texas A&M Vet Medicine).
Checkpoint: You’ve cut all nails (including dewclaws) at a 45-degree angle, given a treat after each nail, and smoothed any sharp edges.
The 45-Degree Angle Technique
Follow this step-by-step cutting sequence:
- Position the clipper at the bottom of the nail, angled upward at 45 degrees. If you’re unsure of the angle, look at the natural slope of the nail’s underside, your cut should roughly mirror that slope.
- Squeeze in one smooth, confident motion. Hesitating or squeezing slowly increases the chance of crushing the nail rather than cutting it cleanly.
- Work front to back. Most dogs tolerate front paws better, so starting there builds momentum and keeps the session positive.
- Give a treat within 2 seconds of each cut. This timing is what makes positive reinforcement work; the treat has to follow the cut immediately, not at the end of the whole session.
Should you cut dog nails vertically or horizontally? Neither; the correct answer is a 45-degree angle following the nail’s natural curve. A vertical cut would go straight into the quick; a horizontal cut across the flat tip creates uneven pressure and a higher risk of splitting.
After cutting, run your finger across the tip. If it feels sharp, a quick pass with a nail file or a brief touch from the grinder smooths it out. WSU Veterinary Medicine confirms that finishing with a light file prevents snags and reduces the chance of the nail catching on carpet or fabric between trims.
One more thing most guides skip: the dewclaw.
Checkpoint: Don’t Forget the Dewclaws
When you’re trimming all of your dog’s toe nails, the dewclaw is the one most owners miss, and it’s the one most likely to cause a problem if neglected.
The dewclaw is the nail on the inner side of the leg, above the paw. Because it never touches the ground, it doesn’t wear down naturally the way the other nails do. It grows faster, curves more dramatically, and can go weeks longer than the rest before anyone notices.
Some dogs have dewclaws on the back legs as well as the front, check both. Trim the dewclaw the same way as the other nails. Because it’s often longer and more curved, it tends to snag on things easily.
A dewclaw that’s been neglected for months can curl in a full circle and grow into the leg pad, a painful and entirely preventable injury. Making dewclaw checks part of every trim session takes about 10 extra seconds.
Standard nails handled. Now let’s talk about the situation that worries owners most: nails that have grown too long to fix in one session.
Step 5: Tackle Overgrown Nails with The Gradual Recede Method
If your dog’s nails are clicking on the floor, they’re already too long, and you can’t fix that in one session. The quick has grown out with the nail, which means cutting to the ideal length today would almost certainly cause bleeding. This is where The Gradual Recede Method comes in.
Nails that click on hard floors are already too long and can alter a dog’s gait and joint alignment over time. A gradual weekly trimming schedule is the safest correction.
Checkpoint: You’ve trimmed 1-2mm from each nail. Set a reminder for 7-10 days from now. Consistency is what makes The Gradual Recede Method work.
Why You Can’t Fix Overgrown Long Dog Nails in One Session
The biology is straightforward: the quick grows out with the nail. In a nail that’s 5mm too long, the quick is also approximately 5mm longer than it should be. Cutting to the ideal length in one session means cutting through the quick, which is exactly what you’re trying to avoid.
Three signs your dog’s nails are too long:
- Clicking on hard floors when they walk normally
- Nails visible touching the ground when your dog stands at rest
- Visible splaying or curving of the toes
The gait impact is worth understanding. Very long nails force the toes to splay outward, which shifts weight onto the joints in a way they weren’t designed to handle. A dog whose nails have been long for months may walk with a slightly altered gait. You might notice them placing their paws differently on hard floors. This isn’t just discomfort; it can cause long-term joint stress if left unaddressed.
The solution is a consistent weekly schedule, here’s exactly how it works.
The Weekly Trim Schedule: How The Gradual Recede Method Works
The Gradual Recede Method is a weekly trimming protocol that encourages the quick to recede by removing 1-2mm from each nail every 7-10 days. It’s not a workaround; it’s working with the nail’s biology.
Here’s what to expect over time:
| Week | Action | Expected Progress |
|---|---|---|
| Week 1-2 | Trim 1-2mm from each nail | Quick begins to recede slightly |
| Week 3-4 | Continue 1-2mm trims | You can trim slightly more without reaching the quick |
| Week 5-6 | Continue the schedule | Most moderately overgrown nails reach a healthy length |
The quick gradually recedes as you trim regularly, letting you shorten the nail a little more each time. Mark your calendar for every 7 days. Even if you only remove a sliver, you’re training the quick to recede, and training your dog to accept the process, which pays dividends long after the nails reach a healthy length.
For severely overgrown nails, curling toward the pad or already touching it, consult a vet before you start. The first trim may require light sedation to be done safely and without trauma. Attempting to trim extremely long dog nails at home in that situation risks both injury and a lasting fear response.
Trim complete. Now take a quick look to make sure everything went as planned.
Verify Your Results
You should now see nails that no longer click on the floor, smooth edges with no sharp tips, and a dog who’s already moved on to sniffing around the room.
Quick post-trim checklist:
- Run your hand over each nail tip, no sharp edges should catch on your skin
- Check for bleeding, even a tiny amount of pink at the tip warrants styptic powder and a treat
- Check the dewclaws specifically, easy to skip, easy to miss
- Watch your dog walk, they should move normally within a few minutes; any limping warrants a closer look
- End on a positive note, give a final treat and calm praise regardless of how the session went
For more on maintaining overall paw health and safety between trims, our paw care guide covers seasonal considerations worth knowing.
If everything checks out, you’re done. If you notice bleeding or your dog is limping, see the Troubleshooting section below.
Most sessions go smoothly. But if something goes wrong, here’s exactly what to do.
Troubleshooting Common Problems
Even experienced owners cut the quick occasionally. The difference between a minor setback and a traumatic event is how you respond in the next 10 seconds.
Three problems account for the vast majority of nail-trimming failures: cutting the quick, a dog that refuses to cooperate, and nails so severe that home trimming isn’t the right call. Each has a specific, actionable solution.
For dogs whose anxiety runs deeper than nail trims, a step-by-step desensitization plan for fearful dogs can help address the root pattern.
Professional help for anxious dogs is sometimes the right answer, according to VCA Animal Hospitals: for dogs with an existing fear of nail care, a vet can use a light sedative to trim nails without fear or struggle, and that’s not giving up; it’s making the right call.
Most problems are recoverable. The only unrecoverable outcome is giving up, because your dog needs regular nail trims to stay comfortable.
If You Cut the Quick
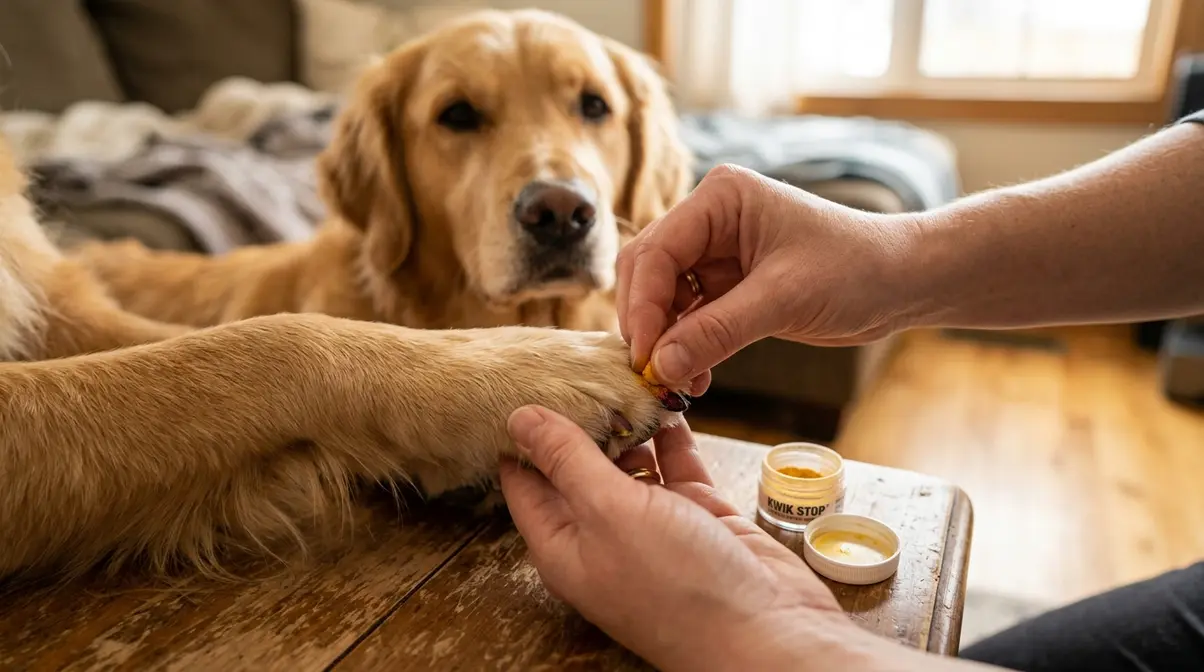
Problem: The nail is bleeding; your dog yelped or pulled away.
Cause: The cut reached the blood vessel inside the nail. It’s more likely with dark nails or overgrown nails, and it happens to almost everyone who trims regularly.
Fix, follow this sequence:
- Stay calm. Your dog reads your reaction directly. A panicked owner creates a panicked dog, turning a minor accident into a traumatic event. Breathe, lower your voice, and move slowly.
- Apply styptic powder (such as Kwik Stop) or cornstarch to the tip of the nail with firm pressure for 30 seconds.
- Reward your dog immediately with a high-value treat, within 2-3 seconds of applying the powder.
- Do not continue trimming that session if your dog is distressed. Don’t punish them for reacting; the yelp was involuntary.
- Monitor for 10 minutes to confirm bleeding has stopped.
If you don’t have styptic powder, press a clean cloth or the flat side of a dry bar of soap against the nail tip; both can slow bleeding while you locate the powder.
⚠️ If bleeding doesn’t stop within 10-15 minutes, contact your veterinarian.
Bleeding stopped, dog rewarded. Now let’s talk about the harder problem: a dog who simply won’t cooperate.
If Your Dog Refuses or Fights
Problem: Your dog pulls away, snaps, or shuts down when the clippers appear.
Cause: Anxiety from past negative experiences, being cut too short, the snap sound of the clippers, or being restrained in a way that felt threatening.
Fix, a 5-step escalation:
- Return to the desensitization protocol from Step 1. Don’t skip steps. The 4-step paw desensitization sequence is the foundation, if your dog is fighting the process, go back to step one of that sequence and rebuild from there.
- Break sessions into smaller units: one paw per day, or even one nail per day.
- Use a lick mat to occupy your dog’s attention during the trim itself.
- Try a grinder instead of clippers if the snap sound is the trigger, many dogs who panic at clippers tolerate the quieter, vibrating motion of a grinder.
- For severe cases, consult a vet about anti-anxiety options before the next session.
One nail a day is not a failure; it’s a strategy. A dog who tolerates one nail calmly is making progress. Knowing how to hold your dog to cut their nails matters here too: the restraint technique from Step 1 (forearm across the shoulder, not a full hold-down) reduces the sensation of being trapped. For broader anxiety support, our guide on managing a dog’s anxiety during stressful events covers the behavioral science behind why these protocols work.
For most dogs, patience and consistency resolve resistance over time. But some situations call for professional help.
When to Call a Professional
Not every nail situation belongs at home. Three specific scenarios call for professional intervention:
- Nails have curled and are growing into the pad. This requires veterinary removal, not home trimming. Attempting it yourself risks serious injury and extreme pain.
- The dog’s phobia is severe enough that every session ends in injury or extreme distress. A vet can provide a safe sedation option that makes the trim possible without trauma, this is a medical decision, not a grooming preference.
- You have a physical condition that makes safe restraint impossible. A groomer or vet tech is the right solution here. There’s no workaround that makes unsafe restraint safe.
Asking for professional help isn’t giving up; it’s making the right call for your dog’s comfort and safety.
⚠️ If you’re unsure whether your dog’s nails require veterinary attention, call your vet, a brief phone consultation is usually free.
Before we wrap up, here are the answers to the questions owners ask most often.
Frequently Asked Questions
How do I shorten my dog’s nail quickly?
The fastest safe method is to use sharp clippers and trim thin slivers at a 45-degree angle every 7-10 days. This gradual approach, The Gradual Recede Method, encourages the quick to recede over 4-6 weeks, allowing you to progressively shorten the nail without bleeding. For a single session, you can safely remove the curved tip only, roughly 1-2mm. Trying to reach the ideal length in one session with overgrown nails almost always results in cutting the quick.
Is it better to cut dog nails wet or dry?
Dry nails are the standard; most owners trim them without any preparation, and it works perfectly well. That said, nails trimmed after a bath or a walk in wet grass are slightly softer, which can make cutting smoother and reduce the chance of splitting, especially with thick nails. The difference is minor for most dogs. If yours has particularly thick or brittle nails, a quick soak or bath before trimming is worth trying.
What can I use to trim my dog’s nails at home?
Three tools work well at home: scissor-style clippers, guillotine-style clippers, and a nail grinder. Scissor-style clippers offer the most control and suit most dogs; guillotine-style clippers work well for small dogs with thin nails; grinders file gradually and are quieter for dogs who panic at the snap of clippers. A scratchboard, plywood covered with sandpaper, is a clipper-free option for dogs with severe clipper phobia. Whichever tool you choose, sharp and well-maintained equipment makes the biggest difference.
Should you cut dog nails vertically or horizontally?
Neither; cut at a 45-degree angle, following the nail’s natural curve from the bottom upward. A straight horizontal cut across the tip is more likely to cause the nail to split or splinter, and it puts uneven pressure on the quick. The 45-degree angle mirrors the natural slope of the nail’s underside and produces a cleaner, smoother finish. After cutting, run your finger over the tip; if it feels sharp, a quick pass with a nail file smooths it out.
What to do if a dog’s nails are too long?
Trim a small amount, 1-2mm, every 7-10 days rather than trying to reach the ideal length in one session. When nails are overgrown, the quick has elongated with them, which means cutting to the correct length immediately would almost certainly cause bleeding. With consistent weekly trims, the quick gradually recedes, allowing you to shorten the nail over 4-6 weeks. If the nails have curled into the pad, that requires a veterinarian; don’t attempt it at home.
How much Benadryl can I give my dog to cut his nails?
Do not give your dog Benadryl or any medication for grooming without explicit guidance from your veterinarian. The correct dosage depends on your dog’s weight, health history, and any medications they’re already taking, factors only a vet can assess safely. Self-medicating can cause serious side effects, including sedation that’s too deep for safe home management. If your dog’s anxiety is severe enough that you’re considering medication, that’s a conversation worth having with your vet, there are safer, vet-supervised options available.
⚠️ This article does not provide veterinary medical advice. Always consult a qualified veterinarian before administering any medication to your dog.
What not to do when cutting dogs’ nails?
The four biggest mistakes are using dull clippers, cutting too much at once, panicking if you hit the quick, and punishing a nervous dog. Dull clippers crush the nail instead of cutting it cleanly; cutting too much at once with overgrown nails almost guarantees hitting the quick. If you do hit the quick, staying calm and applying styptic powder is the correct response, not stopping nail trims altogether. Punishing a dog for resisting creates a negative association that makes every future session harder.
Bringing It All Together
Trimming your dog’s nails at home is a 5-step process that takes about 15 minutes once you know where to cut. The key is identifying the quick, the pink oval in light nails, the chalky ring around a dark center dot in dark nails, and cutting at a 45-degree angle. For overgrown nails, The Gradual Recede Method (1-2mm every 7-10 days) is the safest path to a healthy nail length. With consistent practice, this becomes one of the most routine parts of your dog’s care.
The Gradual Recede Method matters beyond nail length. Each session builds your dog’s tolerance for the process, reduces your own anxiety, and prevents the quick from ever getting out of control again. The owner who once made their dog bleed doesn’t have to be afraid of the next session; they just need a protocol they can trust and a schedule they’ll actually keep.
Set a reminder for 7 days from now. Gather your clippers, styptic powder, and your dog’s favorite treats. Start with one paw. That’s it. Once you’ve finished, apply a little soothing cracked or dry paw pads balm to keep the paws comfortable between sessions.
➤ Sharp clippers, the chalky ring with its dark center, and seven days between sessions: that’s everything you need to trim your dog’s nails at home without fear.
If this topic interests you, our companion article on Best Dog Nail Clippers: Expert Picks for 2026 covers more detail.