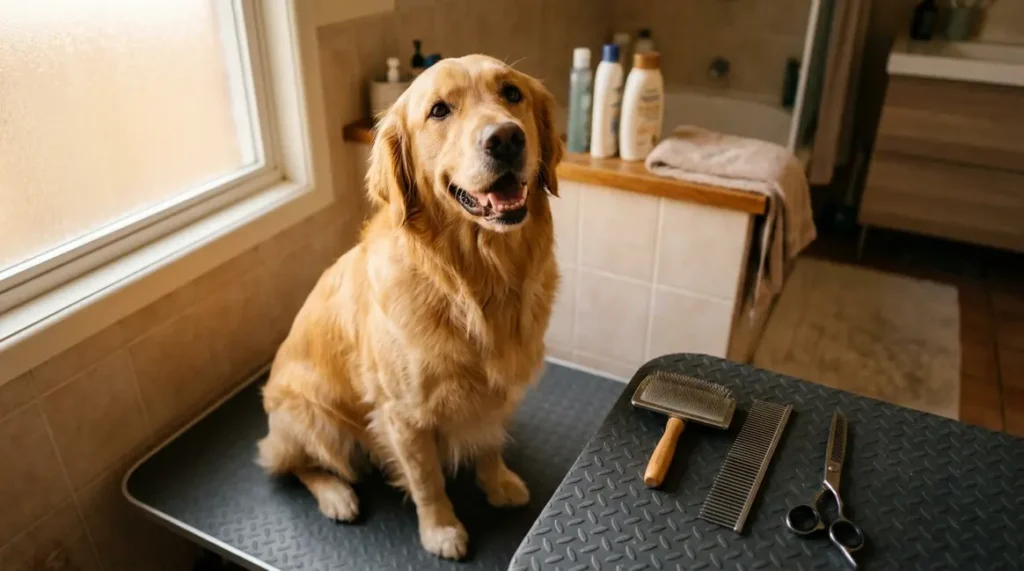
“I’m too nervous to send my girl to the groomer after all the stories I’ve heard about dogs being anxious and ‘not the same’ after returning.”
That feeling is more common than you might think. And it’s exactly why learning how to groom a golden retriever at home is worth the effort.
When grooming goes wrong, whether at a professional salon or at home, the consequences are real: hot spots from incomplete drying, mats that tighten into painful knots, a stressed dog who dreads every future session. But when it goes right, grooming becomes one of the most connected, caring routines you share with your Golden. By the end of this guide, you’ll know exactly how to do it safely, step by step, so you can skip the groomer anxiety entirely. The routine covers 6 steps: Brush, Bathe, Dry, Trim, Clip, and Check.
To groom a golden retriever at home, work through six steps: brushing the double coat, bathing with dog-safe shampoo, thorough drying, trimming paws and feathering, clipping nails, and cleaning ears. A full session takes 1.5-3 hours depending on coat condition. With the right tools and this guide, you can do it safely and confidently.
Written by Coral Drake · Reviewed by Brianna York, Former Veterinary Technician · Last updated July 29, 2026 · Sources accessed July 2026
You can groom a golden retriever at home in 6 steps, brushing, bathing, drying, trimming, nail clipping, and ear cleaning, using The Golden Groom Framework, which doubles as a health check every session.
- Never shave a Golden’s double coat: it disrupts natural insulation and can cause permanent coat damage.
- Hot spots are preventable: always dry your Golden 100% after a bath, damp fur is the #1 cause.
- Start with brushing: removing mats before bathing prevents them from tightening in water.
- Grinch feet need thinning shears: straight scissors on paw fur risk cutting skin between the toes.
- Puppy grooming starts early: introducing tools at 8-12 weeks sets the foundation for stress-free sessions for life.
What You’ll Need Before You Start Grooming Your Golden at Home
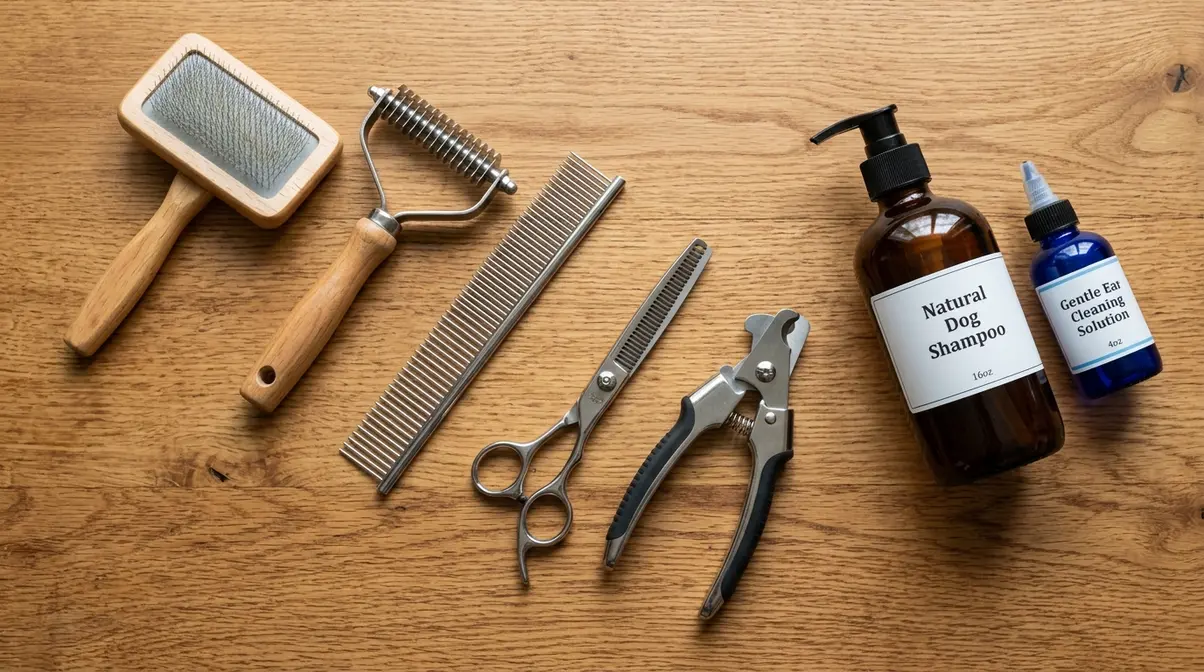
A Golden Retriever’s double coat, a dense, soft undercoat beneath a layer of water-resistant guard hairs, requires specific tools that single-coated breeds simply don’t need. Most guides list tools without explaining why. For a double-coated dog, each tool has a distinct job, and skipping one means the coat doesn’t get properly groomed. The GRCA grooming guide is clear: a slicker brush, undercoat rake, and metal comb are the core toolkit for at-home grooming, and each one addresses a different layer of the coat.
For top tips for at-home pet grooming, the ASPCA recommends a slicker brush to remove tangles and a bristle brush to catch dead hair. For double-coated breeds like Goldens, you’ll need to go further. According to a guide on essential grooming tools for double-coated dogs, must-haves include shed-control shampoo and a high-velocity dryer, tools that make a real difference in coat quality and session time.
Having the right tools for each of the 6 steps is what makes The Golden Groom Framework work. An underprepared owner is an anxious owner. This section removes the “I don’t know what to buy” barrier entirely.
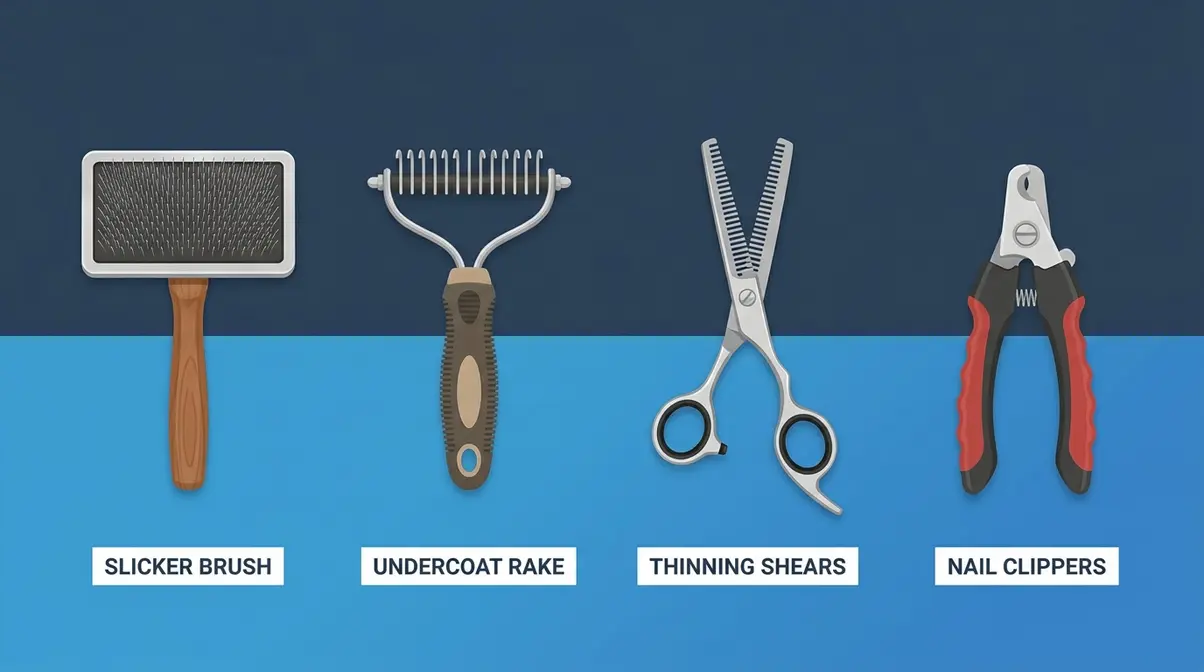
For choosing the best deshedding tools for Golden Retrievers, a deeper breakdown of brush types and brands is available, but here’s everything you need to get started.
The Essential Tool List for a Golden’s Double Coat
The topcoat is made up of guard hairs, the longer, water-resistant outer layer you see. The undercoat is the dense, soft insulating layer underneath. You need different tools for each.
Use tools in this order during a grooming session:
- Slicker brush (fine wire pins on a paddle head): removes tangles and loose hair from the topcoat; your daily maintenance tool
- Undercoat rake (wide-spaced teeth that reach through the topcoat): pulls loose undercoat out from the root layer, non-negotiable during spring and fall shedding season
- Metal comb (fine and medium teeth): runs through the coat after brushing to detect any remaining mats; if it snags, there’s still work to do
- Thinning shears (angled blending scissors): the correct tool for feathering and “Grinch feet” trimming; straight scissors risk cutting skin between the toes
- Straight scissors (blunt-tipped): for final paw tidying only, used carefully, never pointed toward the skin
- Nail clippers or nail grinder: clippers are faster; grinders are gentler for nervous dogs
- Dog-safe shampoo and conditioner: pH-balanced for canine skin (never human shampoo, more on this in the Mistakes section)
- High-velocity dryer or blow dryer on cool setting: the professional choice for a double coat; blows water out rather than just evaporating surface moisture
- Ear cleaning solution and cotton balls: for the final step
- Nice to Have:
- Non-slip grooming mat or rubber bath mat
- Detangling spray (speeds up mat removal)
- Styptic powder (a clotting agent for nail quick accidents, foreshadowed in Step 6)
Think of the slicker brush as your daily maintenance tool and the undercoat rake as your seasonal deep-clean, especially during spring and fall shedding season.
Estimated Time and Session Planning
A full grooming session covering all 6 steps takes 1.5-3 hours, depending on coat condition and how cooperative your Golden is feeling. Brushing alone takes 15-30 minutes for a well-maintained coat, longer if mats are present.
If your dog gets restless, split the session: bath and dry one day, trim and nails the next. A quick maintenance brush 2-3 times per week takes only 10-15 minutes and dramatically reduces full-session time. Short, consistent sessions beat infrequent marathon grooms every time.
Once your tools are ready and your space is set, here’s where The Golden Groom Framework begins.
Step 1: Set Up Your Grooming Space and Gather Your Tools
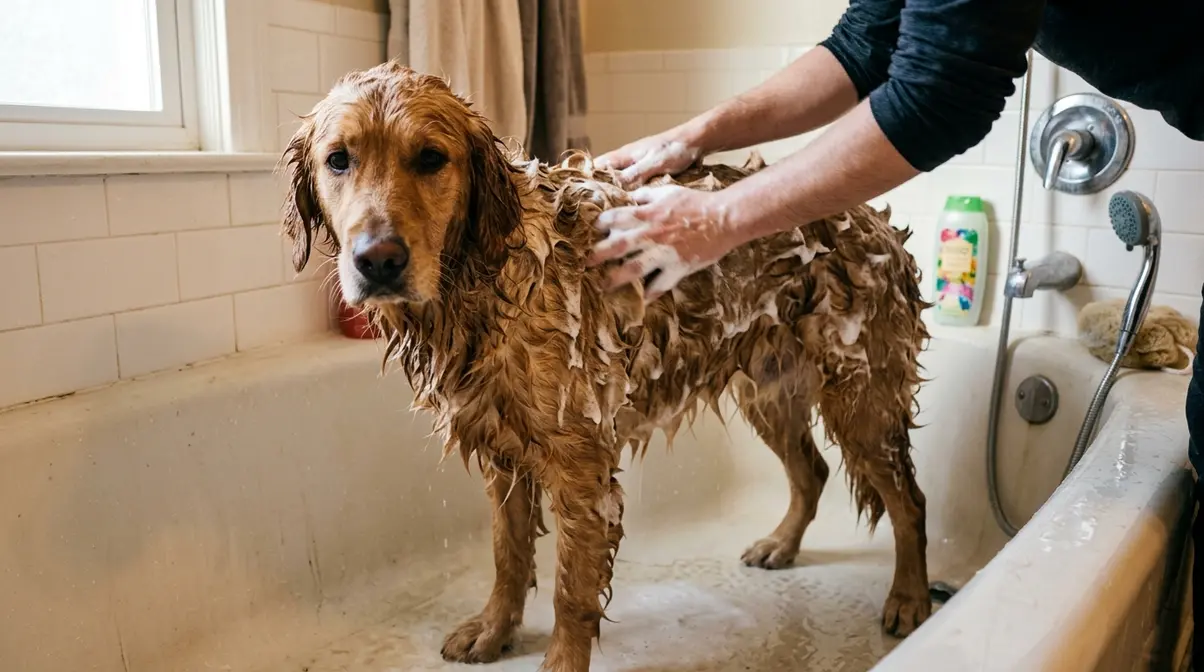
Before your Golden comes anywhere near the brush, your space should be set up and your tools within arm’s reach. A calm, prepared environment is the difference between a smooth session and a stressed dog who bolts mid-groom.
This is the “mise en place” step of The Golden Groom Framework, everything in place before the dog arrives. Skipping it is where most beginners struggle, not the grooming itself.
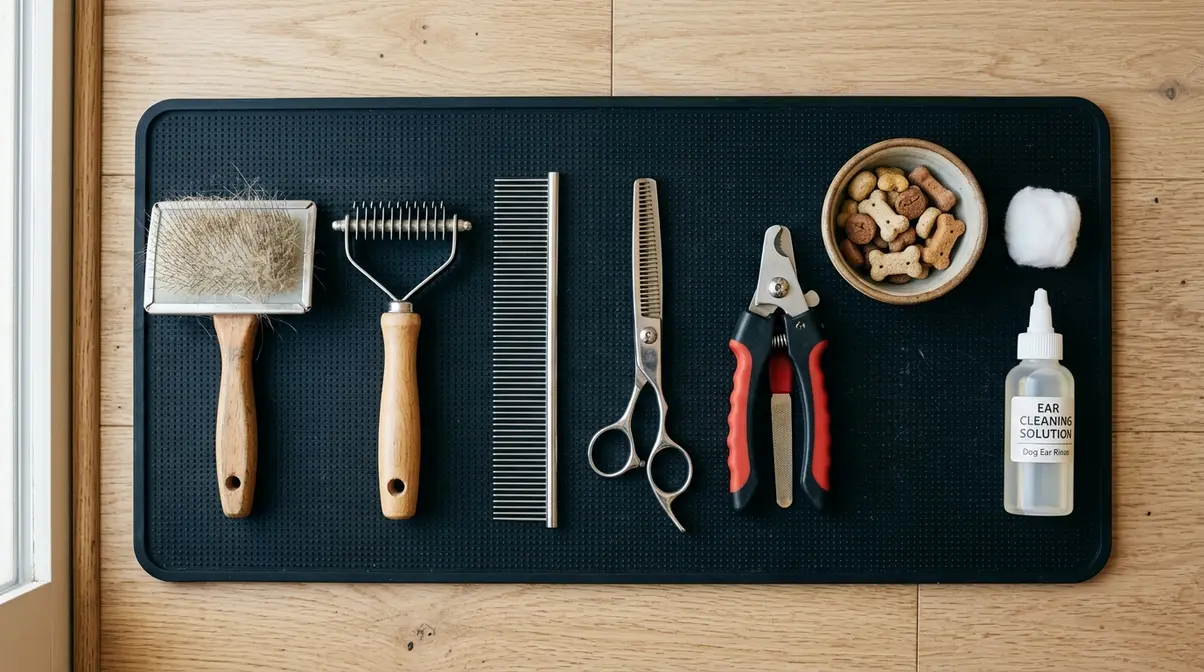
Here’s how to set up:
- Choose your surface. A bathroom floor with a rubber mat, a grooming table, or a shaded outdoor spot all work. The non-slip surface is the priority. It prevents slipping and helps your dog feel secure.
- Lay out tools in order of use: slicker brush → undercoat rake → metal comb → thinning shears → nail clippers → ear supplies.
- Place treats in a small bowl within reach. You’ll use them throughout the session. The ASPCA recommends pairing grooming with treats and praise to build positive associations, so keep the rewards flowing throughout.
- Remove other pets from the space. Distractions lead to sudden movements, which lead to accidents.
- Keep the session under 2 hours for your dog’s first few times. This is especially important for puppies: a rushed early session creates lasting negative associations.
A non-slip surface and pre-laid tools are the two setup factors most likely to determine whether a grooming session stays calm or ends early.
Checkpoint: Your tools are laid out in order, treats are ready, and your Golden is calm in the space. You’re ready to begin.
With everything in place, it’s time for the most important step in the entire routine: the brush-out.
Step 2: Brush Out the Coat and Tackle Any Mats
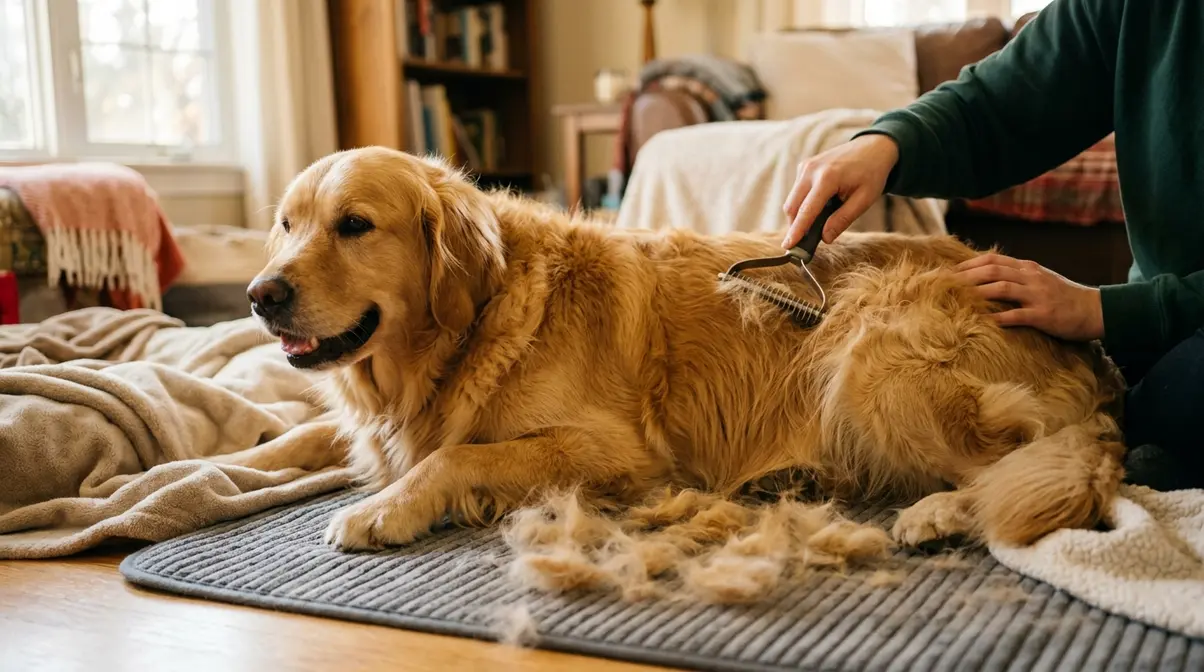
Golden Retrievers shed year-round, with two heavy “coat blows” each spring and fall when the undercoat releases in significant volume. A thorough brush-out before bathing removes the bulk of that loose undercoat and prevents mats from tightening in water, the most common beginner mistake. According to the Dos and Don’ts for double coats from Merryfield School of Pet Grooming, brushing before bathing is the correct sequence for double-coated breeds.
Brushing a Golden Retriever before bathing, not after, is the single most important technique for preventing mats from tightening in water.
For a comprehensive grooming and health guide for Goldens, our full breakdown covers seasonal coat care in more depth. But here’s the sequence that matters for every session.
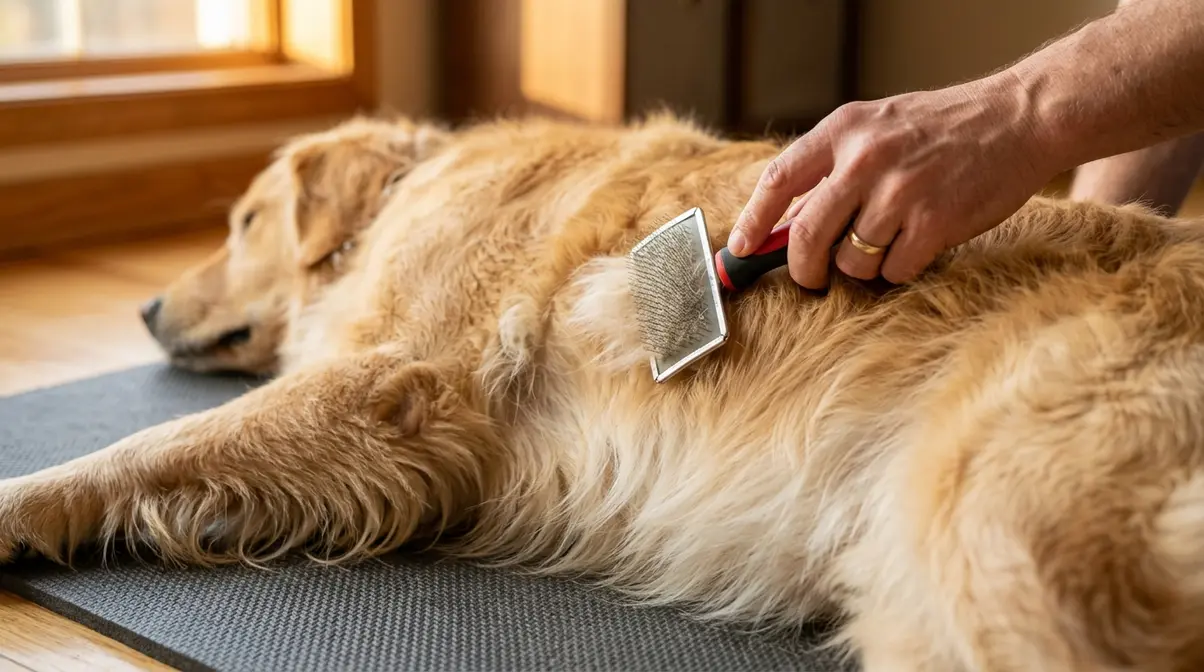
The three-tool brushing sequence:
- Slicker brush first. Use light pressure and short strokes, pressing too hard scratches the skin. Work in sections from the rear forward, lifting the topcoat as you go. This handles surface tangles and loose guard hairs.
- Undercoat rake second. This is where the real de-shedding happens. The rake’s wide-spaced teeth reach through the topcoat to pull loose undercoat from the root layer. Use long, gentle strokes following the direction of hair growth.
- Metal comb third. Run it through the entire coat. If it glides through without resistance, you’re done. If it snags, there’s a mat. Address it before the bath.
Before the slicker brush touches the coat, mist it lightly with water or detangling spray. Brushing a bone-dry, dirty coat snaps hairs and builds static. Then give extra time to the spots that mat first: behind the ears, under the collar, in the “armpits” where the front legs meet the chest, around the base of the tail, and between the rear legs.
While brushing, run your hands along the skin to feel for lumps, warm patches, skin irritation, or parasites. This is the “check” built into every step of The Golden Groom Framework: every session is also a health audit.
Checkpoint: You should now be able to run a metal comb through your Golden’s entire coat with no resistance. If the comb snags, there’s still a mat, address it before moving to the bath.
How to Remove Mats Safely Without Hurting Your Dog
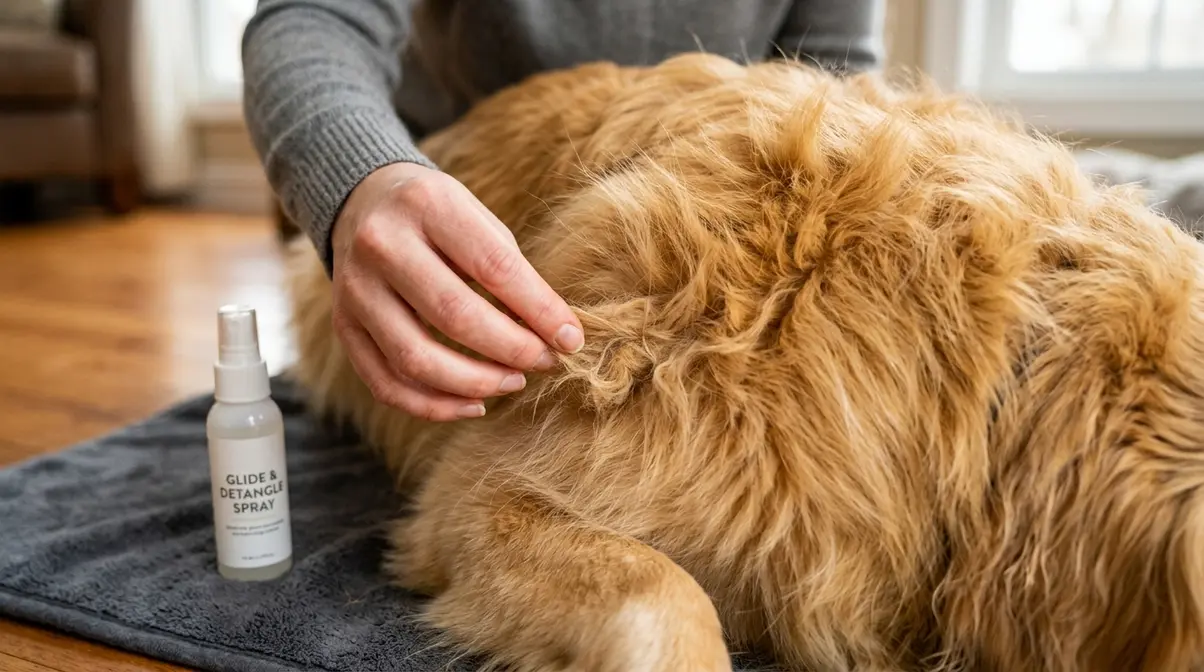
Never pull a mat. The instinct to tug is understandable, but it pulls the skin and causes real pain. Always work from the outside edges inward, using your fingers to tease apart the tangle before introducing any tool.
Apply a detangling spray or a small amount of coconut oil to the mat and let it sit for 30 seconds. Then use a mat splitter, a tool with a serrated blade, to divide large mats into smaller sections. Work slowly, and keep the blade angled away from the skin. Never use scissors pointed toward the skin.
If the mat is tight against the skin and covers an area larger than a golf ball, stop and book a professional groomer. Forcing it risks cutting the skin, and a professional groomer has the tools to remove severe mats safely. Recommending a pro when the situation calls for it is the honest advice, not a failure.
With a mat-free, fully brushed coat, it’s time for the bath.
Step 3: Bathe Your Golden Retriever
The bath is only effective if the coat is wet all the way to the skin and rinsed completely clean. A Golden’s dense double coat traps shampoo easily, and incomplete rinsing is one of the most common causes of post-bath skin irritation. As the how to groom your dog at home guide from the Humane Society notes, thoroughly drying the dog before using any trimming tools is essential, and thorough rinsing is what makes that possible.
The AKC recommends bathing Golden Retrievers every 4-6 weeks as a general guideline, and for how often you should bathe a Golden Retriever, our full guide covers how coat condition, lifestyle, and season affect that schedule.
Bathing sequence:
- Use lukewarm water, not hot. Hot water can dry out the skin and make the experience uncomfortable.
- Use a handheld showerhead or pitcher. Wet the coat thoroughly, working down to the skin through the topcoat. The topcoat is water-resistant, so this takes more time than it looks.
- Apply dog-safe shampoo and work it in the direction of hair growth. Avoid the eyes and ear canals. Lather down to the skin.
- Rinse until the water runs completely clear. This step takes longer than you expect: residual shampoo causes itching and skin irritation.
- Apply a light conditioner if using one. It helps detangle the feathering and reduces static, making the post-bath brush-out easier. Rinse thoroughly.
While shampooing, look for redness, bumps, or hot spots, the bath is another health-check opportunity built into The Golden Groom Framework.
Rinsing a Golden Retriever’s coat until the water runs completely clear, not just mostly clear, is the step most owners skip, and it’s the leading cause of post-bath skin irritation (Humane Society, How to Groom Your Dog at Home).
Checkpoint: Your Golden is fully rinsed, the water runs clear, and there’s no shampoo residue in the coat. Now comes the most critical step: drying.
Choosing the Right Shampoo for a Double Coat
Look for shampoos labeled “pH-balanced for dogs” or “formulated for double-coated breeds.” Our guide to the best shampoos for Golden Retrievers breaks down deshedding and skin-soothing formulas by coat need. Dog skin has a higher pH than human skin. Human shampoo strips the natural oils from the double coat and disrupts the skin barrier, leading to dryness and increased infection risk. Avoid shampoos with artificial fragrances, sulfates, or parabens for the same reason.
A light conditioner after shampooing helps detangle the feathering and reduces static, making the post-bath brush-out easier.
Once the bath is done, don’t reach for the towel just yet: drying technique matters more than most owners realize.
Step 4: Dry Thoroughly to Prevent Hot Spots
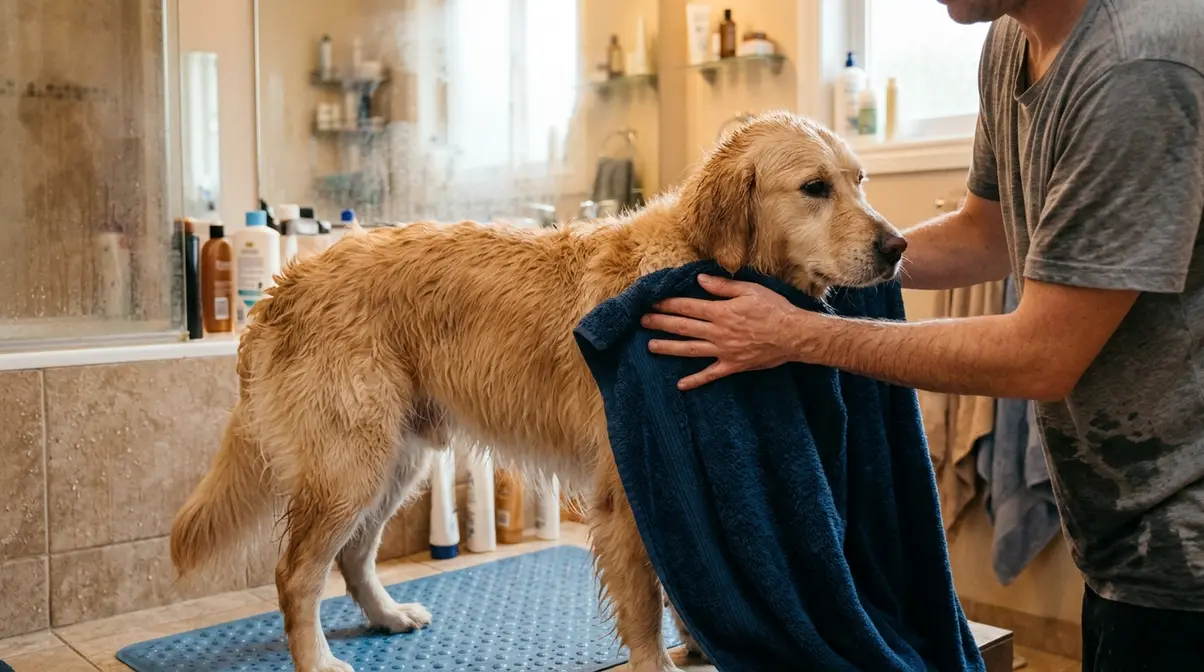
Picture this: your Golden looks dry on the surface, but the dense undercoat is still damp against the skin. Within hours, that trapped moisture can trigger a hot spot, a red, moist, painful bacterial infection that spreads fast. Thorough drying isn’t a finishing touch; it’s a health step.
Hot spots in Golden Retrievers most commonly develop in areas where moisture is trapped after bathing, behind the ears, under the “armpits,” and at the base of the tail, making thorough drying the most important preventive step. Cornell University College of Veterinary Medicine provides home care for hot spots, recommending gentle cleaning with a mild antibacterial cleaner like chlorhexidine for early-stage treatment.
Drying sequence:
- Towel press first, press the towel into the coat, don’t rub. Rubbing creates tangles and static.
- Blow dryer on cool or low-heat setting. High heat damages the double coat over time. Work in sections, moving the dryer constantly.
- Lift the topcoat and dry the undercoat layer first. This is the layer that traps moisture. Surface-dry isn’t good enough.
- Check the five hot spot zones: behind the ears, under the “armpits,” the groin area, the base of the tail, and between the toes. Press your fingers against the skin in each zone.
The coat must be 100% dry before any trimming begins. Wet fur doesn’t cut cleanly, and damp skin is vulnerable.
Checkpoint: Run your fingers through the coat and press against the skin in the five hot spot zones. If it feels cool and dry everywhere, you’re ready to trim.
What Are Hot Spots and How Do You Spot Them Early?
Hot spots (acute moist dermatitis) appear as red, moist, hairless patches of skin, often circular, 1-4 inches in diameter, that the dog will lick, bite, or scratch obsessively. They develop within hours of moisture being trapped against the skin, especially in warm weather or humid conditions.
If you find a hot spot during drying, clean it gently with a mild soap or chlorhexidine solution. As Cornell University’s College of Veterinary Medicine notes, this is appropriate for early home care, but a large or rapidly spreading hot spot needs a vet visit, not more home treatment. Don’t attempt to treat severe hot spots yourself.
With a fully dry coat, it’s time for the most satisfying part of the session: the tidy-up trim.
Step 5: Trim the Paws, Ears, and Feathering
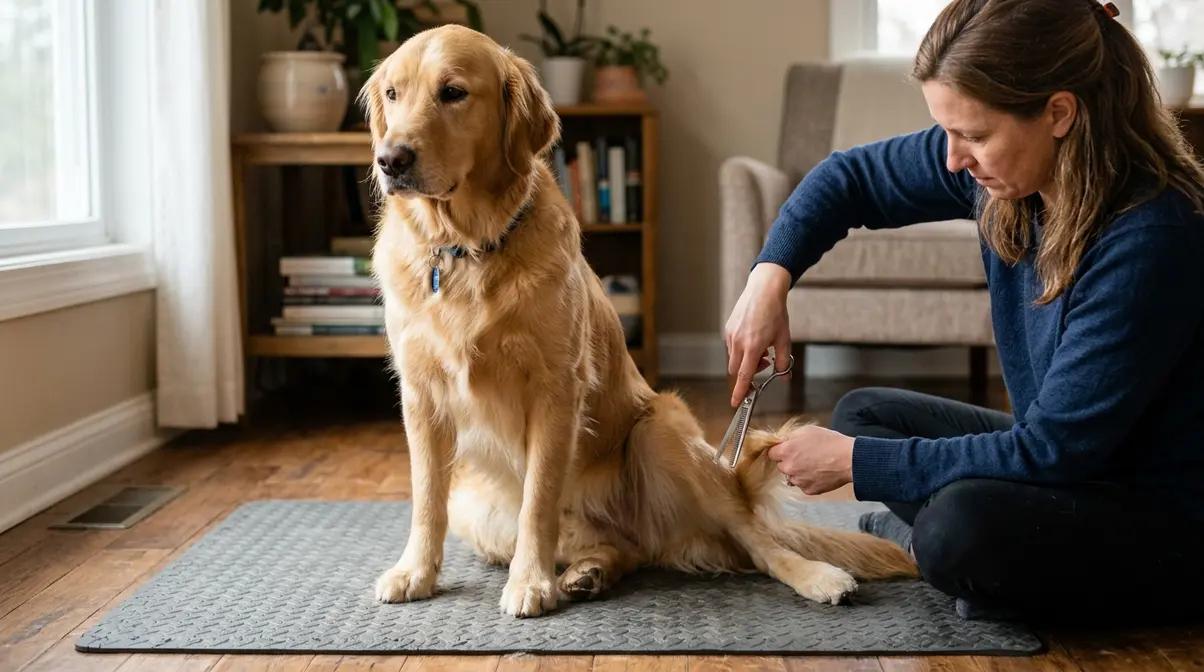
A Golden’s “proper haircut” isn’t a haircut at all. It’s a tidy-up. The goal is to trim three areas (paws, ears, and feathering) using thinning shears, while leaving the body coat completely untouched. Clippers on a Golden’s main body coat are never appropriate.
Thinning shears, not straight scissors, are the correct tool for trimming a Golden Retriever’s feathering and paw fur. Straight scissors create blunt lines that look unnatural and risk cutting skin between the toes (GRCA, Grooming Your Golden).
This is The Golden Groom Framework’s “Trim” phase, and it doubles as a health check. While trimming paws, inspect the pads for cracks, foreign objects, or signs of irritation. While trimming ear feathering, look for redness, odor, or discharge.
After trimming, a lick-safe paw balm recipe for after trimming can help soothe and protect freshly trimmed pads, especially in winter.
Checkpoint: Your Golden’s paws are neat and level with the pad, the ear feathering is blended and rounded, and the leg feathers are tidy. No blunt lines anywhere.
How to Trim “Grinch Feet” (Paw Pad Fur)
“Grinch feet”, the overgrown fur that grows between and around a Golden’s paw pads, is more than an aesthetic issue. That extra fur causes slipping on hard floors and traps moisture and debris between the toes, which can lead to irritation or infection.
Use thinning shears held parallel to the paw pad. Trim the fur level with the pad surface, working slowly with the dog’s paw flat on a non-slip surface. For fur between the toes, use blunt-tipped scissors or thinning shears only, never pointed scissors near the webbing.
Hold the paw gently but firmly, trim a little at a time, and check your progress frequently. It’s always easier to take more off than to fix a cut.
Once the paws are done, move up to the ears.
Trimming Ear Feathering and Leg Feathers
Ear feathering: Use thinning shears to blend the long fur on the ear flap into a natural, rounded shape. The goal is a soft, tapered edge that follows the shape of the ear, never a blunt straight cut. Hold the shears at an angle and take a little at a time.
Leg feathers: The long fur on the back of the legs is called feathering. Comb it downward first, then tidy the ragged ends with thinning shears held vertically. Trim only the tips to keep the natural fringe. On the “skirt” and tail, comb the fur out and trim only stray wisps. The tail should stay full and plume-like.
With the trim complete, two quick tasks finish the session: the nails and the ears.
Step 6: Clip Your Golden’s Nails

Nails that click on the floor are too long. Overgrown nails change how your Golden stands and walks, and over time that can strain the joints. Most Goldens need a trim every 3-4 weeks. The tricky part is the quick, the pink vein inside the nail that carries blood and nerves. Cut it and the nail bleeds and hurts, which is exactly how dogs learn to fear nail trims.
Keep the styptic powder you set out in Step 1 within reach. If you do nick the quick, pressing a pinch of styptic powder onto the nail stops the bleeding within seconds. This is the payoff for having it ready before you started.
Nail-clipping sequence:
- Pick your tool. Clippers are faster; a nail grinder is gentler and easier to control for nervous dogs or dark nails where the quick is hard to see.
- Hold the paw steady and separate the toes. Work in good light.
- Cut small amounts at a time. On light nails, stop before the pink quick. On dark nails, trim thin slices until you see a small dark dot in the center of the cut surface. That means the quick is close. Stop there.
- Reward after every few nails. Short, calm sessions build a dog that tolerates trims for life.
If your Golden hates nail trims, don’t force a full set in one sitting. Do two or three nails a day. According to the American Kennel Club, a slow, treat-paired approach is the most reliable way to keep nail care stress-free.
Checkpoint: Your Golden’s nails no longer touch the floor when standing, and nothing is bleeding. One task left: the ears.
How to Clean Your Golden’s Ears
Golden Retrievers have floppy ears that trap warmth and moisture, which makes them prone to ear infections, especially after swimming or bathing. A quick clean at the end of every grooming session is the simplest prevention there is.
- Apply a dog-safe ear cleaner to a cotton ball, or squeeze a vet-approved solution into the ear canal if the product directs it.
- Gently massage the base of the ear for a few seconds. You’ll hear a soft squishing sound as the cleaner loosens debris.
- Wipe the visible part of the ear with the cotton ball. Never push a cotton swab down into the ear canal. It packs debris deeper and can damage the eardrum.
- Let your dog shake. That shaking helps bring remaining fluid up and out.
Watch for a strong odor, redness, dark discharge, or head-shaking between grooms. As PetMD notes, those are signs of an ear infection that needs a vet, not more home cleaning.
Checkpoint: Ears are clean and odor-free, nails are short, the coat is tidy. That’s a complete at-home groom.
How Do You Turn Every Groom into a Health Check?
Every time you brush your Golden, your hands travel over the whole body. That makes grooming the easiest early-warning routine you have. The Golden Groom Framework already builds a check into each step; here are the five places to look on purpose, every session.
- Skin. Part the fur in a few places and look at the skin itself. Healthy skin is smooth, pale pink or light, and has no strong smell. Note redness, flaking, sores, or parasites, and call your vet about any change that doesn’t clear up.
- Ears. Lift the flap and look in. Healthy ears are pink and smell neutral. Redness, dark discharge, a yeasty odor, or repeated head-shaking after you check are reasons to call your vet.
- Paws and nails. Spread the toes and look for cracks, swelling, cuts, or foreign objects like grass seeds and gravel. Do the click test on a hard floor for nail length.
- Mouth and gums. Lift the lip and look at the gum line. Gums should be pink and moist. Pale or white gums need a vet right away. Brown tartar or breath that is worse than usual is worth raising at the next visit.
- Lumps and bumps. Run your hands slowly along the neck, under the jaw, along the chest and belly, and behind the knees. Note anything new, and where it is. Golden Retrievers have a higher cancer risk than many breeds, so show your vet any new lump promptly rather than waiting to see if it goes away.
Keep a simple note on your phone with the date and anything you found. When you can tell your vet “this lump was not there six weeks ago,” that is useful information. You are not diagnosing anything. You are noticing early.
Which Grooming Styles Are Safe for a Golden Retriever?
A Golden can look neat without any harm to the coat. The safe styles all work with the double coat: they tidy the edges and leave the undercoat in place.
- The natural trim. This is the at-home tidy-up from Step 5: feathering blended with thinning shears, paw fur level with the pads, and the body coat left at its natural length. It is all most Goldens ever need.
- The FFF trim. Groomer shorthand for Feet, Face, and Fanny, the three areas that look scruffy first between appointments. If you ask a groomer for “a tidy-up,” this is usually what you get. Once you are comfortable with thinning shears, you can handle the feet yourself.
What to decline anywhere: a full body shave, a razor cut, or any style that takes the coat down to the undercoat. Shaving doesn’t even solve shedding. The coat still sheds, just as short, prickly bristles that stick to fabric. VCA Animal Hospitals also flags a rare complication called post-clipping alopecia, where hair is slow to grow back after clipping. The one real exception is a shave your vet needs for a medical procedure.
What Are the Most Common At-Home Grooming Mistakes?
The 6 mistakes that turn grooming into a battle
- Shaving the double coat. It never grows back the same. Shaving destroys the insulating undercoat that keeps your Golden cool in summer and warm in winter, and it raises the risk of sunburn and coat damage.
- Using human shampoo. Dog skin has a different pH. Human shampoo strips protective oils and dries the skin, which invites irritation and infection.
- Bathing before brushing. Water tightens existing mats into hard knots that then have to be cut out. Always brush first.
- Leaving the undercoat damp. Trapped moisture is the number-one cause of hot spots. Dry all the way to the skin.
- Cutting nails too short. Hitting the quick hurts and bleeds, and it teaches your dog to dread every future trim. Small cuts, styptic powder ready.
- Marathon sessions. A stressed, exhausted dog learns to hate grooming. Split long sessions and keep them positive.
Every one of these is avoidable with the routine above. The single thread running through all six: patience beats speed. A calm 20-minute session your dog tolerates is worth more than a rushed full groom that ends in a fight.
Frequently Asked Questions
How often should you groom a Golden Retriever at home?
Brush 2-3 times a week, and daily during the spring and fall coat blows. Bathe every 4-6 weeks per AKC guidance, or when your Golden is genuinely dirty. Trim nails every 3-4 weeks and clean ears at every bath. A full trim-and-tidy session every 6-8 weeks keeps the paws, ears, and feathering neat.
Should you shave a Golden Retriever in summer?
No. A Golden’s double coat insulates against heat as well as cold, and shaving it removes that protection while exposing skin to sunburn. It can also grow back patchy or coarse. To keep your Golden cool, deshed the undercoat thoroughly instead of shaving.
What tools do you actually need to groom a Golden at home?
The core kit is a slicker brush, an undercoat rake, and a metal comb for the coat, thinning shears for feathering and paws, nail clippers or a grinder, dog-safe shampoo, and an ear cleaner. A high-velocity or cool-setting dryer makes drying the dense undercoat far easier.
How do you calm a dog that hates grooming?
Go slow and keep it positive. Pair every tool with treats, start with short sessions, and stop before your dog gets overwhelmed. Break the routine across several days if needed. Two calm nails a day beats one stressful full set. For puppies, introducing the tools at 8-12 weeks builds lifelong tolerance.
Is it cheaper to groom a Golden Retriever yourself?
Yes, over time. Professional grooming runs roughly $50-$90 per visit every 6-8 weeks. The at-home toolkit is a one-time cost of about the same as one or two salon visits, and it lasts years. The bigger payoff is a dog that stays calm because grooming happens on familiar ground with a familiar person.
When should you see a professional groomer instead?
Book a pro when mats are tight against the skin and larger than a golf ball, when your Golden is too anxious or wriggly for you to trim safely, or when nails have overgrown so far the quick has extended. There’s no shame in it. Knowing your limit is part of good grooming.
Can grooming help you catch health problems early?
Yes. A regular brush-out puts your hands on every part of your Golden’s body, so it is the easiest time to notice new lumps, skin changes, ear odor, paw injuries, or pale gums. Check the same five areas every session and jot down anything new. You are not diagnosing anything; you are giving your vet earlier, more specific information.
What is an FFF trim for a Golden Retriever?
FFF stands for Feet, Face, and Fanny, the three areas that look untidy first between full grooms. It is a light tidy-up that leaves the double coat intact, which makes it a safe style to ask a groomer for. You can learn the feet portion at home with thinning shears.
The Bottom Line
Grooming a Golden Retriever at home comes down to six steps done in the right order: brush, bathe, dry, trim, clip, and check. Brush before the bath so mats don’t tighten. Dry all the way to the skin so hot spots never start. Trim with thinning shears, never clippers on the body coat. Clip nails in small cuts with styptic powder ready. And treat every session as a health check, running your hands over the skin, pads, and ears as you go.
Do it a few times and the routine stops feeling like a chore. It becomes 90 minutes of quiet, hands-on time that keeps your Golden comfortable and lets you catch small problems early, all without the groomer anxiety that started this guide.
If this topic interests you, our companion article on Best Dog Nail Clippers: Expert Picks for 2026 covers more detail.