Author: Coral Drake
Disclaimer: This article is reviewed by Brianna York, Former Vet Tech, and is intended for informational purposes only. Always consult your veterinarian before applying any new product to your dog’s paws, especially if they are severely cracked, bleeding, or showing signs of infection.
Your Golden Retriever just bounded in from a snowy walk, and now she is licking her paws non-stop. Before you reach for the first lotion you find, know that most human moisturizers contain ingredients that are toxic to dogs.
Winter salt and ice strip the natural oils from paw pads fast, and a Golden’s active lifestyle means those pads take a beating every single day from October through March. By the end of this guide, you will have a simple dog paw balm recipe for cracked winter pads that is lick-safe, non-greasy, and ready in under 15 minutes. You will learn why pads crack, how to make and apply the balm, which ingredients are truly safe, and exactly when to call your vet instead.
A DIY dog paw balm recipe for cracked winter pads takes three ingredients and under 15 minutes to make, and it is safe if your dog licks it.
- Winter salt and ice strip natural oils from paw pads, causing painful cracks
- Beeswax, shea butter, and coconut oil form a 3-Layer Winter Paw Shield: barrier, moisture, and healing
- Two recipe variations cover daily protection and intensive healing for deeper cracks
- Essential oils like tea tree are toxic to dogs and must never be added
- See a vet if a pad is split, bleeding, or shows signs of infection
Why Do Your Dog’s Paw Pads Crack in Winter?
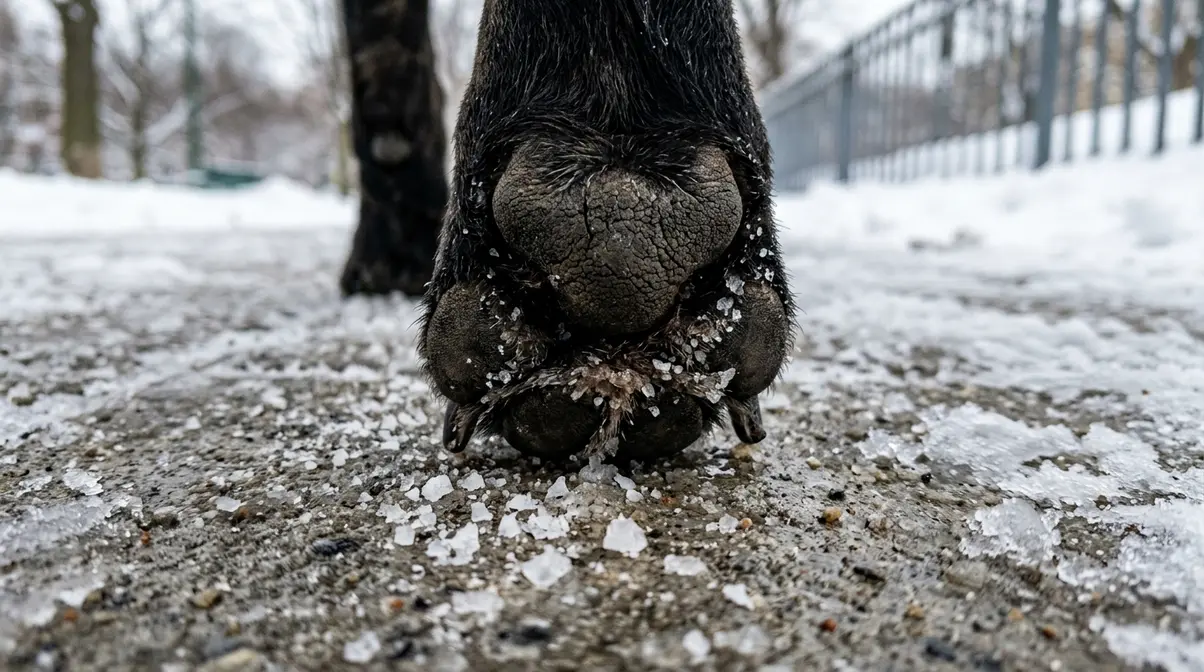
Dog paw pads crack in winter because road salt chemically strips the natural oils from the skin, ice physically splits the surface, and cold air pulls moisture out with every walk. For active dogs like your Golden Retriever, daily exposure makes cracking nearly inevitable without a protective barrier in place.
Paw pads heal significantly slower than other skin areas because they bear weight constantly, making prevention more effective than treatment (Thera-Paw).
What Actually Damages Paw Pads in the Cold?
A paw pad is the thick, cushioned skin on the bottom of your dog’s foot. It is made largely of keratin, the protein that makes paw pads tough, but that toughness has limits.
Road salt is the biggest culprit. The chemical compounds in de-icing products, including calcium chloride and sodium chloride, break down the keratin layer faster than cold alone. Think of it as a slow chemical burn on your dog’s paw skin. Your Golden Retriever, one of the most enthusiastic cold-weather dogs around, is especially vulnerable because she is out there running and leaping through salted sidewalks every day.
Ice creates micro-cracks when your dog’s pad flexes repeatedly on a frozen surface. Those tiny fractures deepen over time, turning into the dry paw pads and cracked paw pads you can see and feel. Cold air compounds the problem because it is dry air, and dry air pulls moisture from any exposed skin just as it chaps human lips.
PetMD on paw pad conditions notes that treatment for canine hyperkeratosis (a condition that causes thickened, cracked paw skin) aims to soften the skin using moisturizing balms to keep it pliable and prevent secondary infections.
What Can You Put on Cracked Paw Pads Right Now?
You have a few safe options to soothe cracked paws while you gather ingredients for the full recipe:
- Plain coconut oil: A small amount applied directly to the pad is non-toxic and moisturizing
- Pet-safe petroleum jelly: Forms a basic barrier and is widely available
- Commercial paw balms: Look for products with beeswax or shea butter as primary ingredients
- The DIY recipe in this guide: The most reliable option because you control every ingredient
One thing to avoid right now: human hand creams and standard body lotions. Many contain xylitol (a sweetener that is highly toxic to dogs), zinc oxide, or synthetic fragrances that can cause serious harm if licked.
TPLO Info on paw keratin confirms that soaking feet in warm water and applying topical ointments can effectively soften excess keratin growth on dog paws.
The most reliable option is a balm you make yourself, because you know exactly what is in it. Here is the recipe Coral Drake has used on her Golden Retriever for two winters running.
How Do You Make This Dog Paw Balm Recipe for Cracked Winter Pads?
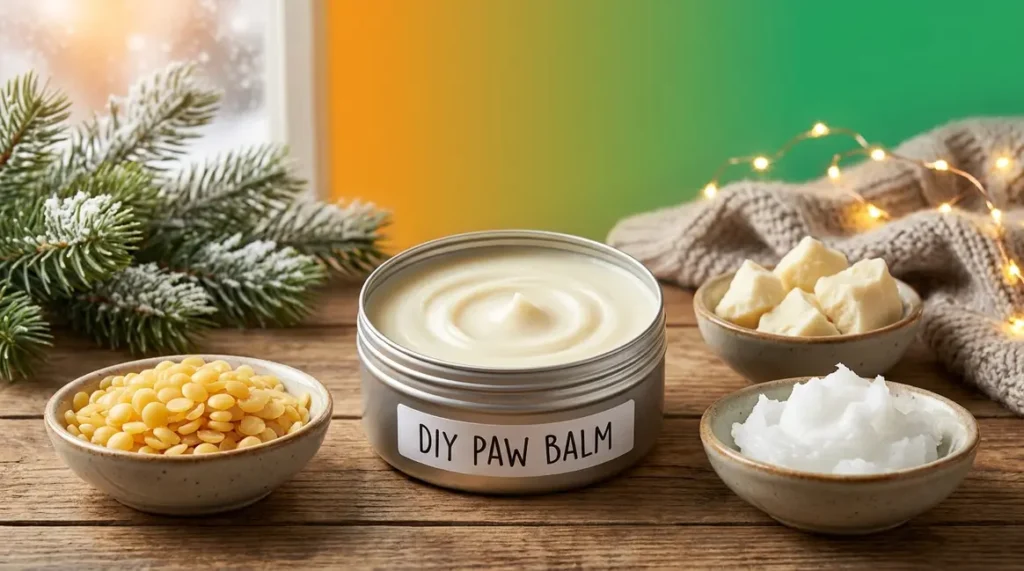
This dog paw balm recipe for cracked winter pads uses three ingredients you can find at most grocery or health food stores. It takes under 15 minutes to make, yields enough balm to last 6-8 weeks of daily use, and every ingredient is safe if your Golden Retriever licks her paws afterward.
This 3-ingredient dog paw balm recipe takes under 15 minutes to make, yields enough balm for 6-8 weeks of daily application, and every ingredient is safe if your dog licks it.
This recipe is built around what Coral Drake calls the 3-Layer Winter Paw Shield: beeswax forms the outer barrier layer, shea butter provides the moisture layer, and coconut oil delivers the healing layer.
What Do You Need Before You Start?
- Equipment you will need:
- Small saucepan
- Heat-safe glass bowl (to create a double boiler)
- Silicone spatula
- Small metal tins or glass jars (2 oz size works well)
- Measuring spoons
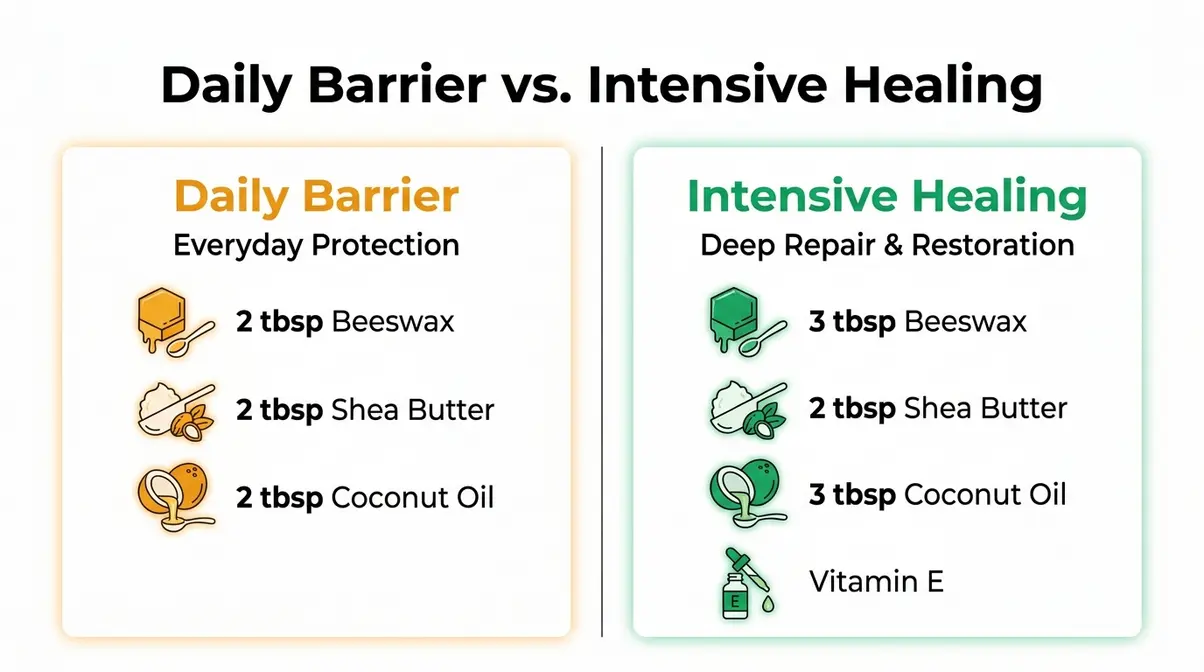
- Daily Winter Barrier (lighter formula, for prevention):
- 2 tablespoons beeswax pellets (beeswax, a natural wax that forms a waterproof barrier on skin)
- 2 tablespoons shea butter (shea butter, a plant-derived fat rich in vitamins A and E)
- 2 tablespoons coconut oil (coconut oil, a natural moisturizer that is safe for dogs to ingest in small amounts)
- Makes approximately 3 oz of balm
- Intensive Healing (richer formula, for already-cracked pads):
- 3 tablespoons beeswax pellets
- 2 tablespoons shea butter
- 3 tablespoons coconut oil
- 1 teaspoon vitamin E oil (optional, acts as a natural preservative)
- Makes approximately 4 oz of balm; slightly richer and softer than the barrier formula
Vegan option: Substitute Candelilla wax (Candelilla wax, a plant-based vegan alternative to beeswax that works equally well) for a fully plant-based balm. Use half the amount, since Candelilla wax is twice as firm as beeswax.
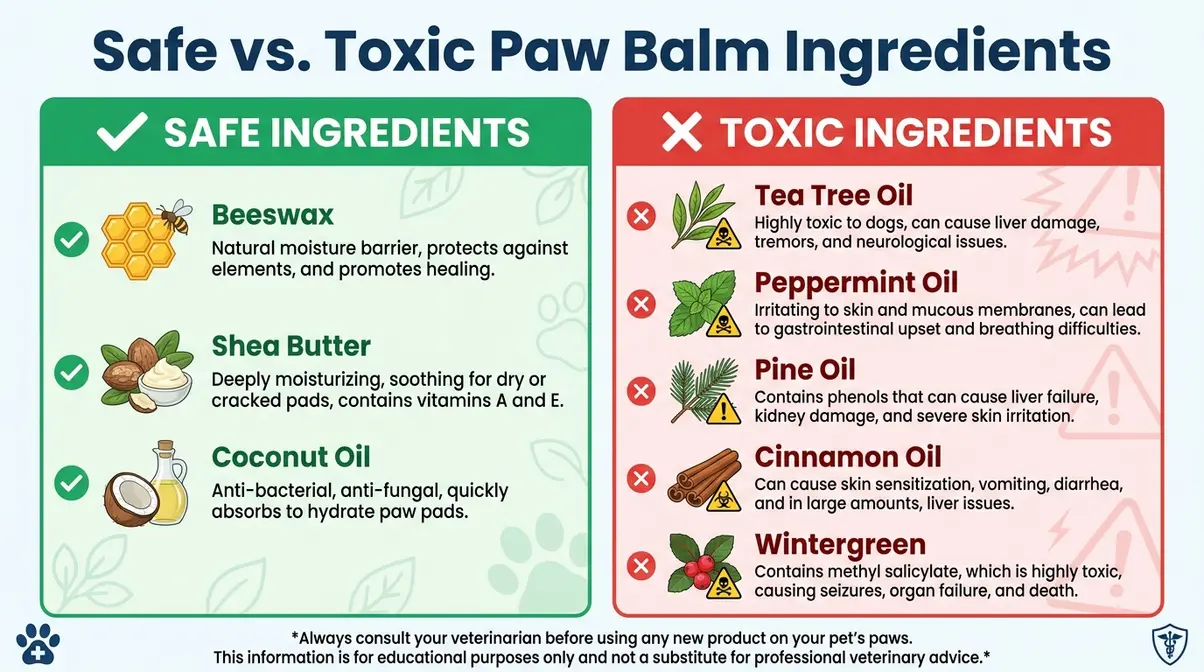
Safety note: Do NOT add tea tree oil, peppermint oil, pine oil, or cinnamon oil to either recipe. These are toxic to dogs. The full safe-versus-toxic list is in the next section.
How Do You Make the Balm? (Step-by-Step Instructions)
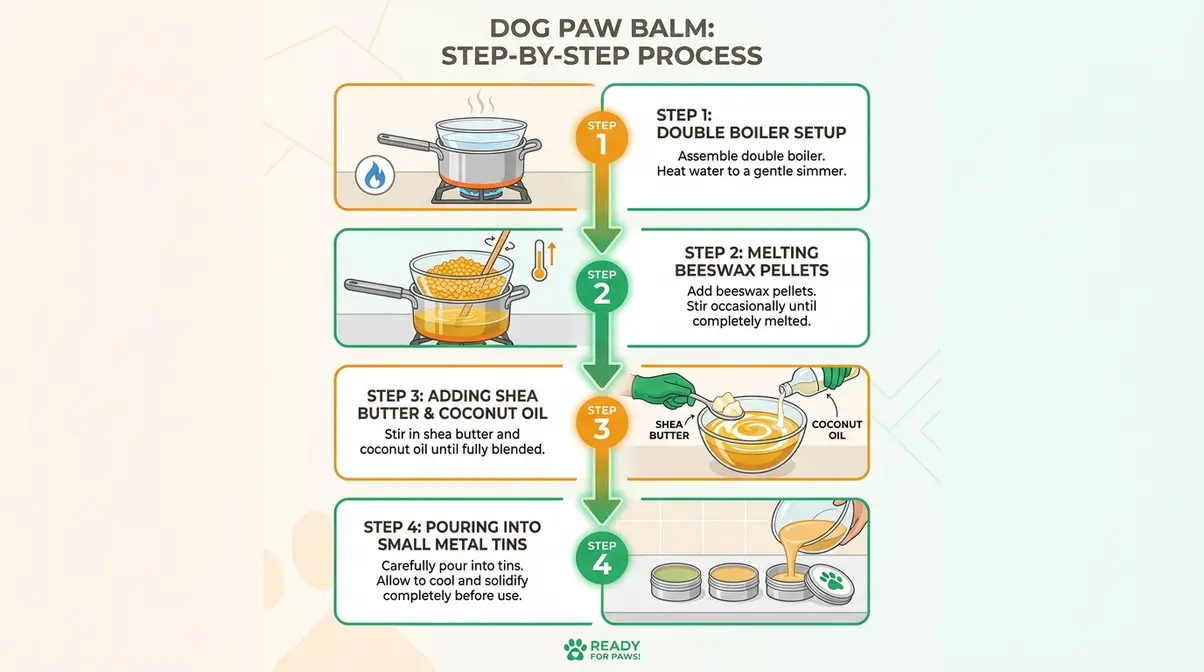
- Set up a double boiler. Place the glass bowl over a saucepan with 1-2 inches of simmering water. Do not let the bowl touch the water. Why: Direct heat can scorch the beeswax and alter its protective properties.
- Add the beeswax pellets first. Stir gently until fully melted, about 3-4 minutes. Why: Beeswax has the highest melting point of the three ingredients and needs the most time.
- Add the shea butter and coconut oil. Stir until the mixture is completely liquid and uniform. Why: Adding them after the beeswax prevents the oils from overheating.
- Remove from heat and pour immediately into clean, dry tins or jars. Work quickly, as the mixture sets fast. Sanitize your containers first by rinsing with boiling water and drying completely.
- Let cool at room temperature for 30-60 minutes until fully solid. Do not refrigerate during the setting process, as rapid cooling can cause the surface to crack.
Troubleshooting: If the balm is too soft and melts on contact with warm hands, add 1 extra teaspoon of beeswax to your next batch. If it is too hard to scoop, reduce the beeswax by 1 teaspoon.
Coral Drake has tested both variations on her Golden Retriever for two consecutive winters. The Intensive Healing formula was noticeably more effective after the first week of application on already-cracked pads.
Can You Add Essential Oils to the Recipe?
The base recipe is complete without any essential oils. Adding them is optional and carries real risk, so read this section before experimenting.
The only oils considered relatively safe for dogs in very diluted amounts are lavender (1-2 drops maximum per 4 oz batch) and frankincense. Even these should be cleared with your vet first.
Oils that are unsafe for dogs and must never be added:
- Tea tree oil (most commonly toxic)
- Peppermint oil
- Pine oil
- Cinnamon oil
- Wintergreen oil
- Pennyroyal oil
These can cause vomiting, liver damage (the medical term is hepatic necrosis, meaning the liver cells break down), and neurological symptoms even in small amounts. According to the Pet Poison Helpline, the most common essential oil toxicities in dogs involve tea tree oil, pennyroyal, oil of wintergreen, and pine oils, which can cause severe reactions including liver damage.
The next section explains the science behind why the three base ingredients are safe, and why those essential oils are not.
Are These Ingredients Safe If Your Dog Licks the Balm?
Yes, this dog paw balm recipe is lick-safe. Beeswax, shea butter, and coconut oil are all non-toxic if your dog licks a small amount from her paws. The danger comes from additions, specifically certain essential oils, which can cause serious harm even in tiny quantities.
Beeswax, shea butter, and coconut oil are all non-toxic if ingested in small amounts, making this the safest DIY paw balm base for dogs who lick their paws (AKC, 2017).
Each ingredient corresponds to one layer of the 3-Layer Winter Paw Shield.
Can You Put Coconut Oil on Dogs’ Paws in the Winter?
Yes, coconut oil is a safe and effective choice for your dog’s paws during winter months. Each of the three base ingredients in this recipe plays a distinct role, and coconut oil’s contribution goes beyond simple moisturizing.
Beeswax forms the outer barrier layer. Think of it as a raincoat for your dog’s paw pads. It repels water, salt, and ice on contact, and it solidifies the balm so it stays on the paw rather than soaking in immediately. Beeswax is non-toxic to dogs. If you prefer a plant-based option, Candelilla wax works equally well at half the quantity.
Shea butter provides the moisture layer. It is rich in vitamins A and E, which soften cracked skin and support the skin’s natural repair process. Shea butter is non-toxic if licked in small amounts, making it an ideal choice for dogs who groom their paws after a walk.
Coconut oil delivers the healing layer. It is a natural moisturizer with mild antimicrobial properties that may help prevent secondary infections in minor cracks. Many owners ask whether they can put coconut oil on their dog’s paws in the winter specifically, and the answer is yes. Purina notes that coconut oil is safe for dogs to ingest in small amounts, which answers one of the most common questions about this recipe. Apply a thin layer before bedtime and let it absorb overnight for best results.
The Merck Veterinary Manual, the primary reference guide used by practicing veterinarians, identifies concentrated essential oils as a significant risk for pets, noting that they should never be applied directly to skin or fur.
Which Essential Oils Are Toxic to Dogs?
The base recipe contains none of the following, so you are safe as long as you follow the recipe as written. But if you are ever tempted to customize, here is what to avoid:
- Tea tree oil: The most commonly reported essential oil toxicant in pets, according to the Merck Veterinary Manual. Even diluted concentrations have caused serious harm.
- Peppermint oil: Can cause breathing difficulties and skin irritation.
- Pine oil: Associated with liver damage and neurological symptoms.
- Cinnamon oil: Causes skin burns and can lower blood sugar dangerously.
- Wintergreen oil: Contains methyl salicylate, which is toxic to dogs in small amounts.
- Pennyroyal oil: One of the most dangerous oils for dogs, even in trace amounts.
PetMD confirms that oils such as tea tree, peppermint, pine, cinnamon, and wintergreen are toxic to dogs and should never be applied directly to their skin or fur.
The base recipe is safe exactly as written. Now that you know the recipe is safe, here is how to apply it without leaving greasy paw prints all over your hardwood floors.
How Do You Apply and Store Your Homemade Paw Balm?
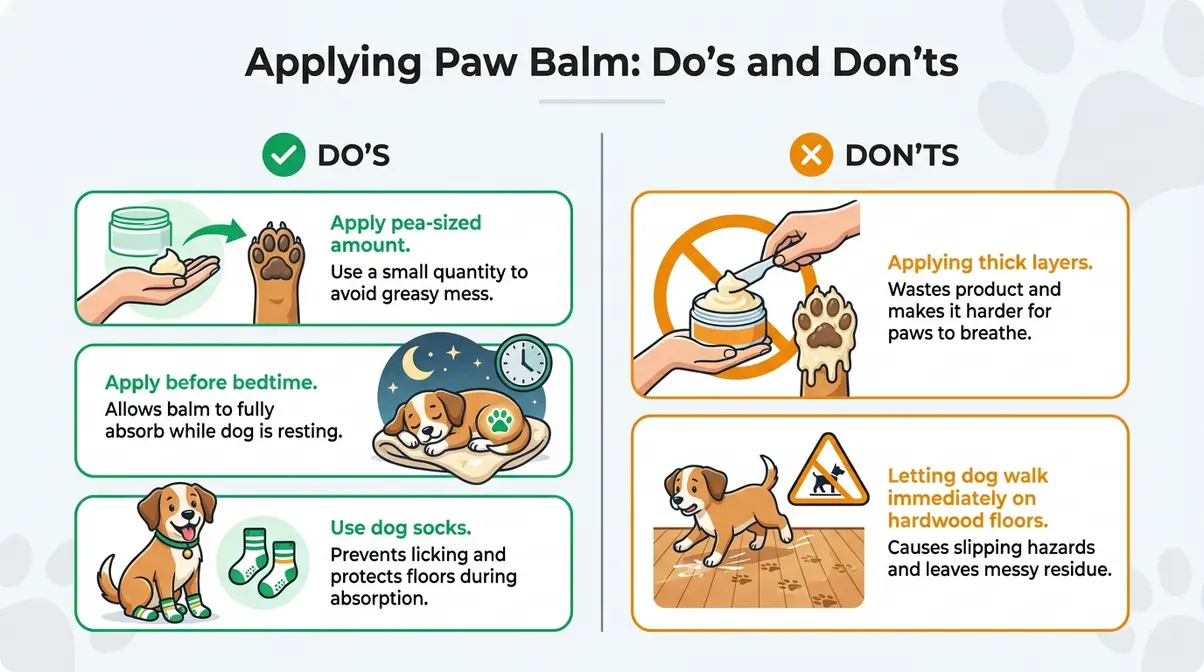
Apply a pea-sized amount of balm to each paw pad, massaging it in gently with your fingers. The best time to apply it is right before bedtime, so the balm absorbs overnight without your dog walking it onto floors.
Apply a pea-sized amount of balm to each paw at bedtime, let it absorb for 5 minutes, and cover with dog socks if your dog tends to lick. This routine prevents greasy floors and maximizes the barrier effect.
When and How Much Should You Apply?
- Best times to apply:
- Five minutes before outdoor walks in winter, to allow partial absorption before contact with salt and ice
- At bedtime, when overnight absorption gives the balm the most time to work
A pea-sized amount per paw is enough. More does not mean better. Applying too much is exactly what causes the greasy-floor problem that puts many owners off paw balms entirely.
One owner described it perfectly:
The fix is simple. Use less balm, not none at all. The barrier layer of the 3-Layer Winter Paw Shield only works if the balm has time to absorb before your dog walks on it, so a thin, well-massaged layer is always more effective than a thick one.
If your Golden tends to lick her paws right after application, distract her with a short training session or a treat for five minutes. Alternatively, slip on a pair of dog socks for about ten minutes. By then, the balm will have absorbed enough to stop transferring.
How Should You Store the Balm?
Store the finished balm in a cool, dry place away from direct sunlight. Room temperature under 75 degrees Fahrenheit (24 degrees Celsius) keeps the balm solid and stable.
- Without vitamin E oil: Shelf life is approximately 6 months
- With vitamin E oil added: Shelf life extends to up to 12 months, since vitamin E acts as a natural preservative
- Signs the balm has gone off: A rancid smell, discoloration, or a grainy texture mean it is time to discard and make a fresh batch
- Label each tin with the date you made it so you always know when to refresh your supply
Daily balm is the right tool for prevention and mild dryness. But if your dog’s pads are already split or bleeding, the situation calls for a different response.
When Should You See a Vet Instead of Using Balm?
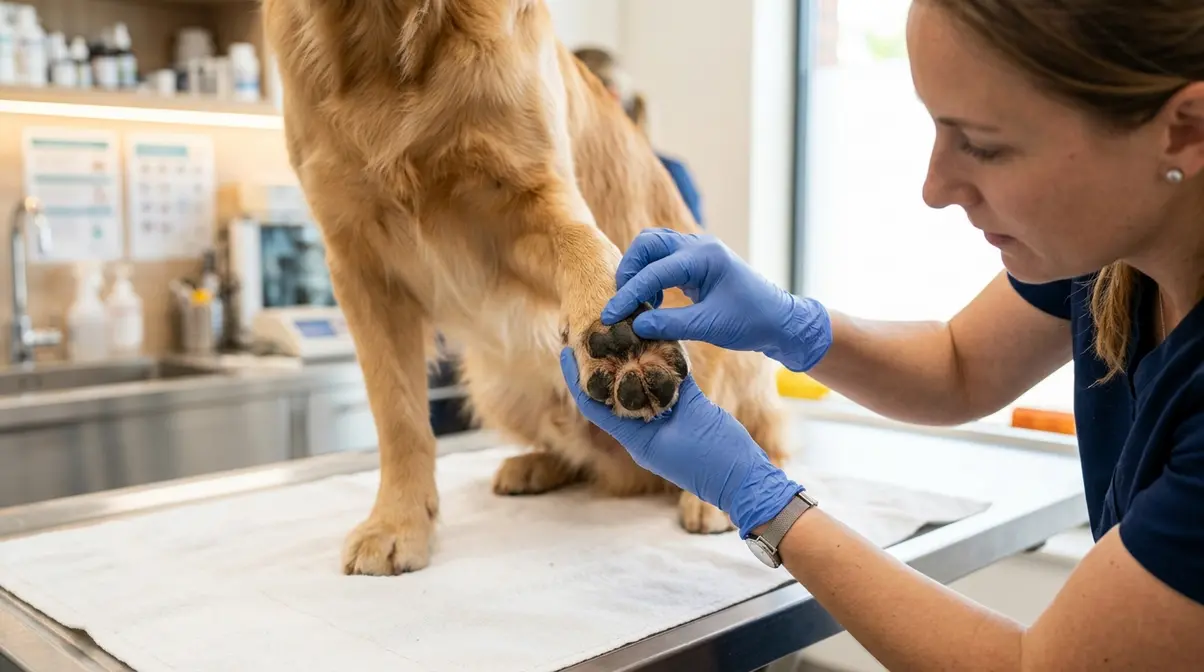
A cracked paw pad is dry and rough but intact. A split paw pad has an actual break in the skin. The DIY balm in this guide is designed for cracked pads. A split pad needs veterinary care first.
The third layer of the 3-Layer Winter Paw Shield is knowing when the shield is not enough.
How Do You Tell the Difference?
Cracked pad (balm is appropriate): Rough texture, flaking skin, mild redness. Your dog may lick occasionally but still walks normally and puts weight on the paw without hesitation.
Split pad (see a vet): A visible break in the skin, bleeding, limping, excessive licking, swelling, or any discharge from the area. This is a wound, not dry skin, and it needs professional assessment.
See a vet if you notice: bleeding that does not stop within 10 minutes, limping that persists after rest, swelling around the pad, yellow or green discharge, or a pad that looks deeply torn rather than surface-dry.
For a very minor surface split with no bleeding and no limping, basic first aid is appropriate while you monitor the situation. Clean the area gently with warm water, pat it dry, and apply a light bandage or dog bootie to keep it clean. If it does not improve within 24 hours, call your vet.
According to Apex Vets, minor paw pad injuries generally take 7-10 days to heal, while deeper lacerations can take 3 weeks or longer to regain full toughness. Thera-Paw adds that paw pads heal much more slowly than other areas of the body because they bear constant weight, meaning even small cuts can take weeks to fully recover.
What Are the First-Aid Steps for a Minor Split?
If the split is minor, here is what to do while you assess whether a vet visit is needed:
- Clean gently with warm water. Remove any visible debris, including salt crystals, ice, or gravel. Do not scrub.
- Pat dry with a clean cloth. Moisture left in the wound can encourage bacterial growth.
- Apply a pet-safe antiseptic if available. Ask your vet for a specific product recommendation in advance, so you have one on hand.
- Cover with a clean bandage or dog bootie to keep the area protected during healing.
- Do NOT apply the DIY paw balm to an open wound. The balm is formulated for intact skin only. Applying it to a split or open area can trap bacteria.
Minor pad injuries heal in 7-10 days with proper care, per Apex Vets. Consistent use of the preventive balm through winter can help you avoid reaching this point entirely.
If you still have questions about the recipe, the ingredients, or when to see a vet, the answers to the most common ones are below.
Frequently Asked Questions
What can I put on my dog’s cracked paw pads?
You can apply a pet-safe moisturizing balm made from beeswax, shea butter, and coconut oil to your dog’s cracked paw pads. These three ingredients create a protective barrier and support skin repair without any risk of toxicity if your dog licks her paws. A simple homemade version costs under $10 to make and lasts 6-8 weeks of daily use. For severe cracks or bleeding, consult your veterinarian before applying any product.
How do you make a natural paw balm for dogs?
Melt equal parts beeswax, shea butter, and coconut oil in a heat-safe bowl set over simmering water, then pour the liquid mixture into small tins and let it cool for 30-60 minutes. The beeswax forms a waterproof barrier, the shea butter moisturizes, and the coconut oil supports healing. The entire process takes under 15 minutes. Do not add tea tree oil or peppermint oil, as both are toxic to dogs.
Can you put coconut oil on your dog’s paws in the winter?
Yes, coconut oil is safe to apply to your dog’s paws in winter and can help soothe dry, cracked pads caused by cold weather and road salt. It is a natural moisturizer with mild antimicrobial properties, and it is non-toxic if your dog licks a small amount. Apply a thin layer and gently massage it in. For best results, apply before bedtime so it absorbs overnight rather than transferring to floors.
How do you heal a split paw pad on a dog?
For a minor split, clean the pad gently with warm water, pat it dry, and cover it with a clean bandage or dog bootie to keep it protected. A split pad is a wound, not just dryness, and it heals much more slowly than other skin because it bears constant weight. Minor injuries typically take 7-10 days to heal. See a veterinarian if the pad is bleeding, swollen, or your dog is limping.
Protect Your Golden’s Paws This Winter
For Golden Retrievers who spend every winter bounding through snow and salt, a homemade dog paw balm recipe for cracked winter pads is one of the simplest, most effective things you can do for your dog’s comfort. The 3-Layer Winter Paw Shield, built from beeswax, shea butter, and coconut oil, takes under 15 minutes to make and keeps paw pads soft, protected, and lick-safe all season long.
Whether you choose the Daily Winter Barrier formula for prevention or the Intensive Healing version for already-cracked pads, the core principle is the same: protect first, heal second, and know when to ask your vet for help.
Mix up a batch tonight and apply it before your Golden’s next walk. Your dog cannot tell you her paws hurt, but she will show you in the way she walks. This recipe gives you a way to help.
➤ A simple three-ingredient balm made tonight can mean a more comfortable walk for your Golden Retriever tomorrow.